
There have been numerous technological developments in guitars ever since their launch, thanks to their frequent use all around the world.
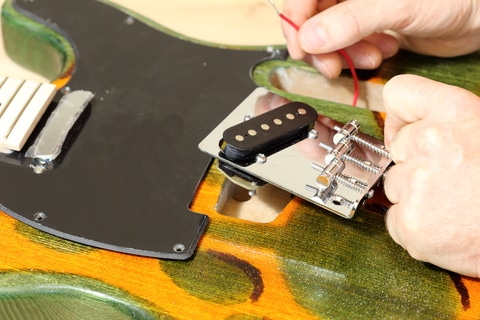
It’s not just the creativity and interest that comes along with the guitars but also the perfection of accuracy and speed. A guitar 3-way switch is an invention that is usually used on electric guitars.
In simple terms, the device that is used to do the switching between the bridge and neck pickup is called a guitar 3-way switch. There are three positions to which the switch can be moved.
That’s how the name ‘3-way switch’ developed. Of all the switches available on the market, a guitar 3-way is the best one that you can get on your electric guitar.
A guitar 3-way switch enables you to change the tonal preferences and play any genre that you want. However, there are some problems that you might encounter while using a guitar 3-way switch.
In this article, we will address these issues and their fixes in detail. So let’s start without
Some Common Guitar 3-Way Switch Problems
1. Getting Stuck
Users of guitar 3-way switches can face many issues, and the most common one is the switch getting stuck.
It is unable to move in any direction and hence, gets stuck in the middle. In this way, both the points stay in touch, and you cannot pick the tunes from the neck or the bridge.
Some of the users totally rely on the guitar 3-way switch for their performance, and if the switch gets stuck, they suffer the most.
The major cause behind this problem is the accumulation of dust on the knob, as it is clear that mere dust can badly affect the switch. To get rid of the dirt, you need to spray the dust cleaner inside the knob and leave it for a few minutes.
If a dust cleaner is not available, you can also rub the alcohol inside the switch. It can get the job done for you. This measure can release the stuck switch and allow you to smoothly switch between the neck and bridge pickups without any hindrance.
2. Moving Freely But Not Switching
Sometimes the 3-way switch can move here and there, but it is unable to perform as the switch is supposed to. Therefore, you cannot do the switching. A broken pickup selector is usually the culprit behind this problem.
Unlike the other problems, the solution to this one is pretty extensive. First, you need to disassemble the switch and the guitar.
Next, you have to look for the connections. Locate the pickup selector and see whether it is broken or not. If yes, get it replaced with a new and functional one.
3. Crackling Sound On Switching
Although this problem is not really common, it does exist. No musician wants to have the performance ruined because of the crackling sound produced as a result of the switching.
Basically, the cause of the crackling sound is the meeting of the two opposite wires at some point at the switch.
This meeting can not only produce the crackling sound, but it can also give rise to a number of other problems. Therefore, you need to make sure that the wires are properly connected.
Apart from the check on the connection of the wires, inspect their condition as well. Frequent use can cause damage to the wires. If there is any damage, you need to replace the wires.
4. Mixed Up Tones
If you are using a guitar 3-way switch and you try to switch to the rhythm position, the working of the respective tone control is perfect.
However, the switching to the middle position gives the same sound as the rhythm, but it is also working for the second tone control for the treble. If you try switching to the treble, you might not hear anything for as long as 10 minutes.
After some time, you can hear the choking sound from the amp. It stays for a while, and then it goes out. Even if you take a look under the hook, you can see that it is all tucked in. So what’s the main problem?
There are 4 prongs in a 3-way switch. There is one upper, two middle, and one lower. Whenever you do the flipping of the switch, there is a high chance that these switches are unable to make the proper contact.
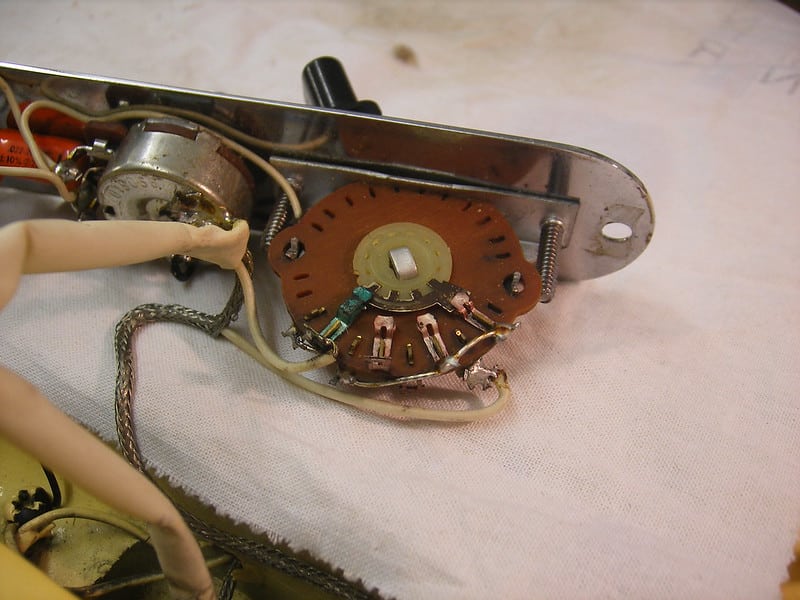
Not leaving the toggle in the middle position increases the chance of this happening. Whether you leave the toggle in the middle position or in the bridge, there is a slight bending in the metal in one prong.
Hence, it is unable to restore its original angle. However, there is a simple fix to it. You just need to lift the toggle out without unhooking any wires.
Take a look at the toggle from the side while you do the back and forth flipping of the switch in the 3 positions.
Check whether there is any contact between them or not. If you don’t observe any contact, the offending prong just needs to be slightly bent back into place.
This fix is very simple as it can be carried on while you have the guitar plugged in. The sad news is that the toggle problem keeps happening from time to time, but it is simple enough to get fixed in a minute.
You cannot just find a toggle replacement because even the new one will have this problem every now and then.
5. Playability Problem
The middle toggle position is where the epi’s are wired, and the purpose is ‘dependent volume controls.’ If one PU is turned down, the rest of them go down as well.
Most people don’t like that. Hence, they do the rewiring of the guitars for the ‘independent volume controls.’ In this way, you can do the blending of both the increments of PU and get your hands on more and more tones.
You can make the change in the simplest possible manner. The lugs on the volume pots need a little switching. However, the tone wires and the toggle wire is where the volume pots go to.
If you take a look from the bottom of the volume pot, there are three lugs from left to right.
You need to melt the solder on the lugs by using a soldering iron. Besides, you can also do the pulling of the wires and put them on other lugs with the help of a soldering iron.
No matter what method you use, the ground lug on the left stays the same. Their conversion can take a few minutes. You can look online for the diagram of this procedure.