iRig HD 2 is one of the most popular audio interfaces out there with a compact design, which means it will fit into your pocket or palm. It’s designed with an ¼” output jacket and a 1/8” headphone output that also has a level and preamp control. In addition, it has a Velcro strip and mounting clip for easier connection.
It can be connected to USB devices, computers, smartphones, and tablets since it has a plug-and-play design. However, many people struggle with the installation problems but we have some solutions that can help!
Problem iRig HD 2 Installation
- Check Connectivity
First of all, you must check the connections, including the cables. Since this is a plug-and-play unit, it needs proper cable connections to operate normally. So, it’s recommended that you check all the cables and make sure they are tightly screwed in the ports.
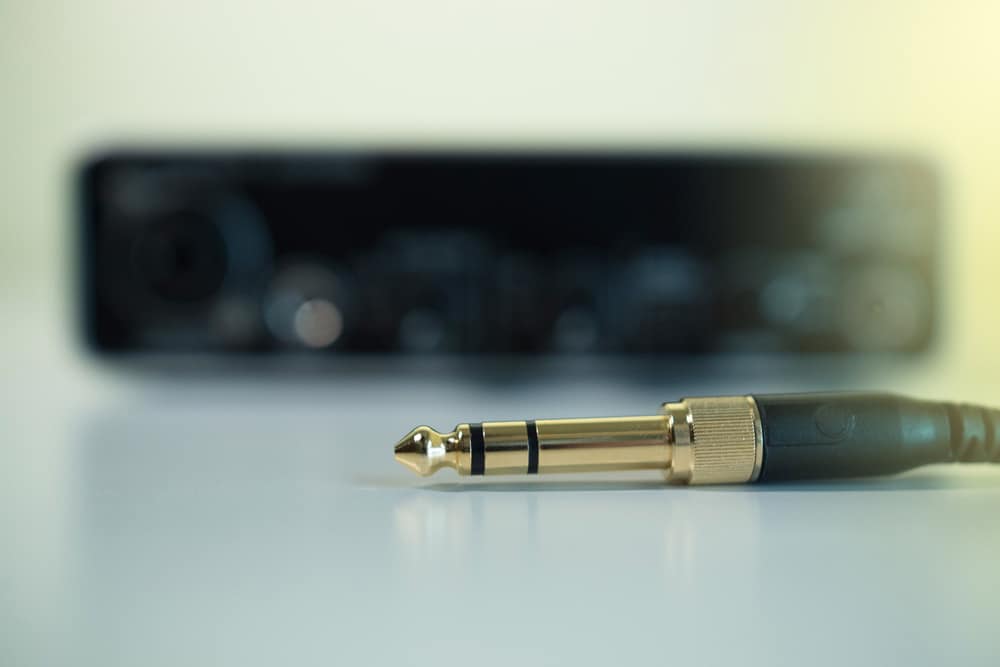
In addition to this, you must ensure that the cables are connected to the correct ports because incorrect cable connections can also lead to installation issues. In addition to this, make sure that the connecting USB port is working well.
- Change The Cables
The installation issues are also caused by the cables. It’s recommended that you inspect the cables and replace them if they are burnt, bent, or damaged. iRig HD 2 come with its own cables and it’s best that you use them to connect this audio interface.
However, if the original cables are damaged, you can get genuine replacement cables from IK’s official website.
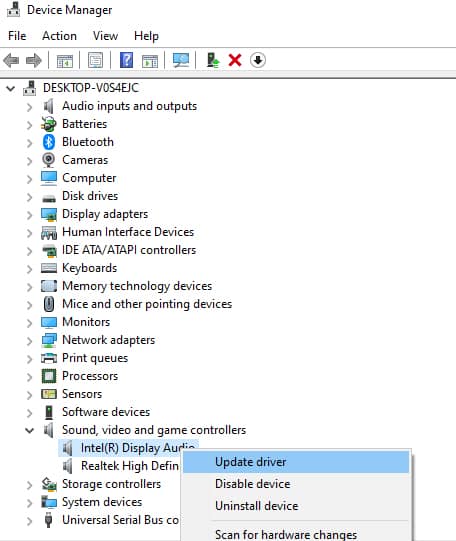
- Check For Drivers
If there is nothing wrong with the cables and connections, you must check the drivers because outdated drivers can result in installation issues. First of all, you must check the USB drivers are updated to the latest available version. In case you don’t know how to update the USB drivers, you can follow the below-mentioned steps;
-
- Open the device manager on the PC
- Choose the category to see the devices’ names and right-click on the USB driver
- Now, select the “Search automatically for USB driver software”
- Then, choose the “update driver” option
- As a result, the driver will be updated
In most cases, the driver updates are downloaded automatically and the Windows Update is used for installation. However, if the USB drivers are outdated, you can follow the above-mentioned steps for manual update.
On the other hand, if updating the USB drivers doesn’t work, it’s recommended that you download the interface’s drivers. The iRig drivers are usually integrated with the control panel software that allows the users to control the interface, promising easier installation.
iRig works the best with ASIO4Aall drivers as they are specifically designed for audio production, which leads to better performance. However, it’s recommended that you opt for the Off-Line settings to select which audio or playback devices you want to use the audio interface.
- Restart
One of the easiest solutions is to restart the interface as well as the computer you are using to connect it. This is because the restart can complete the missing installation and configuration processes.
In addition, the restart will ensure that the drivers are fully installed on the system. So, just turn off the PC and iRig HD 2 and turn them on after five to ten minutes.
- Firmware & Drivers
In case the installation issue is still there and iRig HD 2 is not working properly, it’s recommended that you update the firmware. The firmware update can be downloaded from your IK account.

For this purpose, you might sign in to the IK account, open the “drivers downloads” tab on the dashboard, and the firmware update will be available for download. Keep in mind that the firmware and ASIO drivers are essential for musicians to have professional-grade audio control over the interface.
That’s because the drivers and firmware not only optimize the installation process but also allow the users to adjust the buffer sizes and latency. All in all, installing the iRig HD 2 with ASIO drivers will lead to a stable function.
- Device’s Plugging
If you are complaining about the installation issue because the iRig is not being detected by the Windows system, it’s likely that you have a hardware issue. First of all, you have to de-plug the interface and try connecting to a different yet compatible port on the computer.
As a result, it will be detected in the device manager and you will be able to use the music interface.
- Sleepy System
If you are using the Mac to connect iRig and it shows installation issues, it’s likely that the Mac is in sleep mode. The Mac computers are known to put hard drives in sleep mode when they aren’t in use, with which the audio drivers and MIDI drivers are unmounted and the audio interface stops working.

In that case, it’s recommended that you reboot the Mac to make sure the drivers are enabled. Keep in mind that when Mac is removed from the sleep mode, the drivers are automatically deleted and a reboot is necessary to reconnect them.
To prevent this from happening, you need to disable the energy saver feature from the system preferences. Also, you should always install iRig when the Mac is turned on after the reboot.
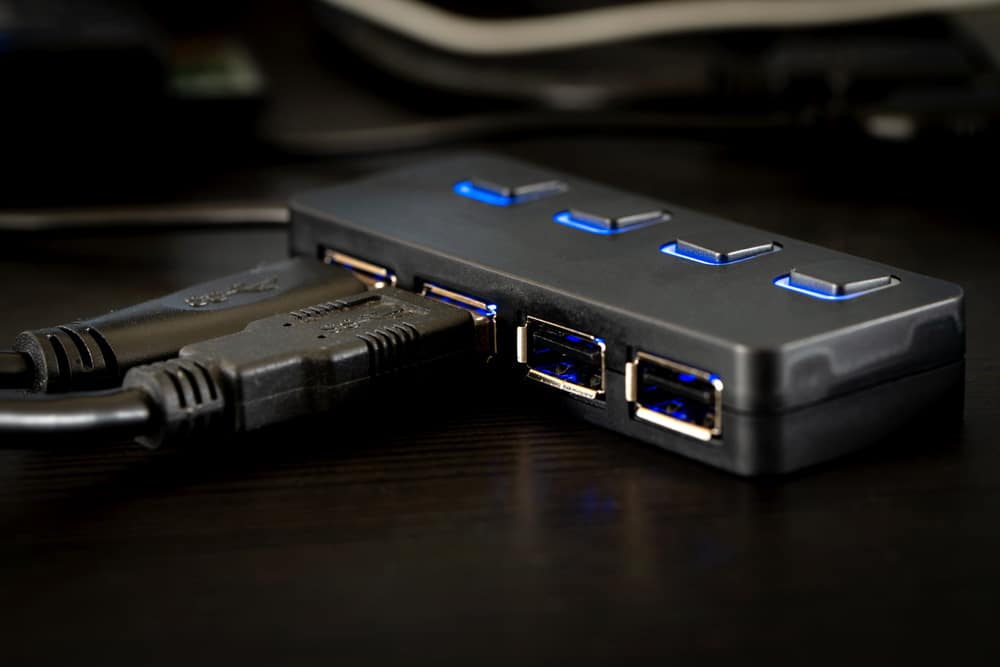
- Hubs
It’s common for musicians to connect some external devices to the computer during music production. The audio interfaces like iRig should be connected to the computer directly.
It’s obvious that hubs are convenient for connecting multiple devices to one USB port but it hinders the interface from connecting with the computer, leading to installation problems. Keep in mind that this is a small audio interface, which means it’s bus-powered and consumes power when the computer is switched on.
So, if the external devices start drawing more power as compared to what a hub can provide, it leads to a loss of connection for iRig. For this reason, the audio interface should be connected to the computer directly. However, if you have no choice but to connect through the hub, opt for an active hub.
- Registration
The majority of users forget to register the iRig and complain about the installation issues. It’s necessary for the users to register the device to start using the device. So, if you haven’t registered the device, you have to sign in to the IK account, open the registration page, add the serial number of the audio interface, and hit the “register” button.
On the other hand, if you don’t have an IK account, you can tap on the “register” button on the main website to create an account.
- Amp Settings
In case you are installing iRig HD 2 to the guitar amp and it’s causing the installation issue, it’s recommended that you use the thru/FX switch. When the switch is set to the FX, the signals from the amp will be transmitted to the guitar amp. On the other hand, when the switch is set to “thru,” it will bypass the amp.
- Audio App
Many people blame the installation issue when there is no sound output from iRig. In case the iRig is not turning on and producing sound, you must download the core audio-compatible audio software or app.
In case you are using the iOS device, the app should work with the audio input, and in the case of the Mac, you have to set the iRig as the input device. Secondly, you could also try lowering the input gain.
If the iRig is not producing sound and the LED indicator is glowing in red color, you must lower the input gain. The input gain can be reduced by rotating the gain knob towards the input connector.
The Bottom Line
Proper installation of iRig HD 2 is essential to edit and process the guitar’s audio signals on the computer or smartphones. However, if you are unable to use the interface because of installation issues, the above-mentioned solutions will help you out!