There is no use in purchasing expensive devices if you don’t have the right software installed on them. Most of the time, users do not want to deal with software that features complicated configurations. However, experimenting with different features can give you a better understanding of multiple presets.
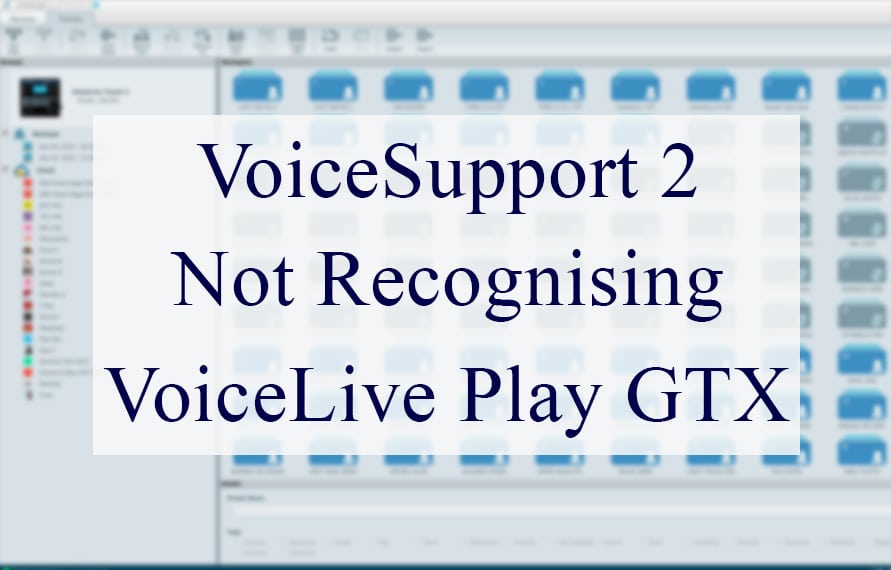
Talking about advancement, TC Helicon has brought a revolution in their firmware update and preset management in the form of the VoiceSupport 2. The VoiceSupport comes with a number of ways in which you can get your device updated and manage the preset sounds in a useful manner.
The best thing about this program is that the manufacturers keep bringing expansion in its capabilities and features, making it more and more robust. As soon as the VoiceSupport runs, it scans the connected devices and gets their data. You can do the management and store of your presets on the ‘Presets’ page.
This page best suits your personal needs by creating settings libraries for them. That being said, as per the current reports, the VoiceSupport 2 fails to recognise VoiceLive Play GTX. Many users have faced a similar problem and reported complaints.
VoiceSupport 2 Not Recognising VoiceLive Play GTX
In this article, we will provide effective solutions to help you through the VoiceSupport 2 not recognising the VoiceLive Play GTX issue.
- Check Version
Whenever you face this problem, the first thing that you need to do is check for the software updates. In most cases, it’s just an outdated version that’s causing the problem, and resultantly the program fails to give the optimal performance.
After you are done updating the application, try to connect the VoiceLive Play GTX again. It will most likely get recognised through the application.
- End The Background Tasks
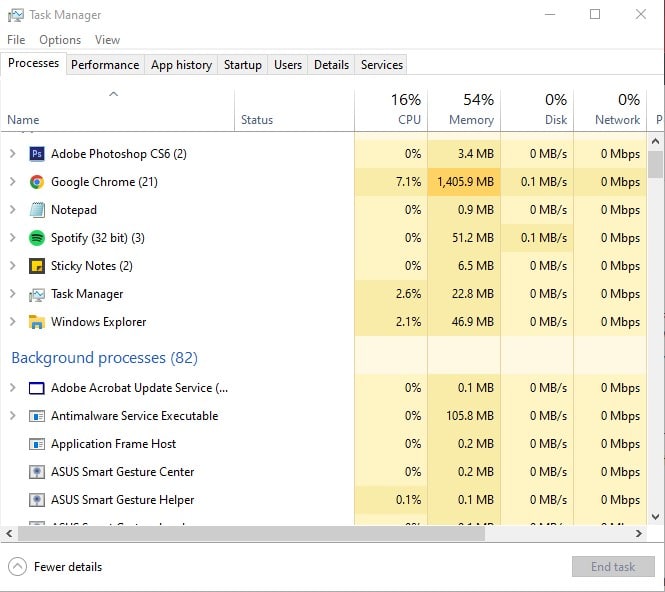
Many users have gotten rid of the problem where the VoiceSupport 2 does not recognise the VoiceLive Play GTX by removing the background applications running on the system. So whenever you get errors while trying to connect the VoiceLive GTX with this program, you can also try a similar approach and get your issue resolved.
It doesn’t matter which device you are using, just end all the tasks from the background and try starting the VoiceSupport 2 again. Then connect the Play GTX with the software and see if it gets recognised by the program or not.
- Reinstall The Application
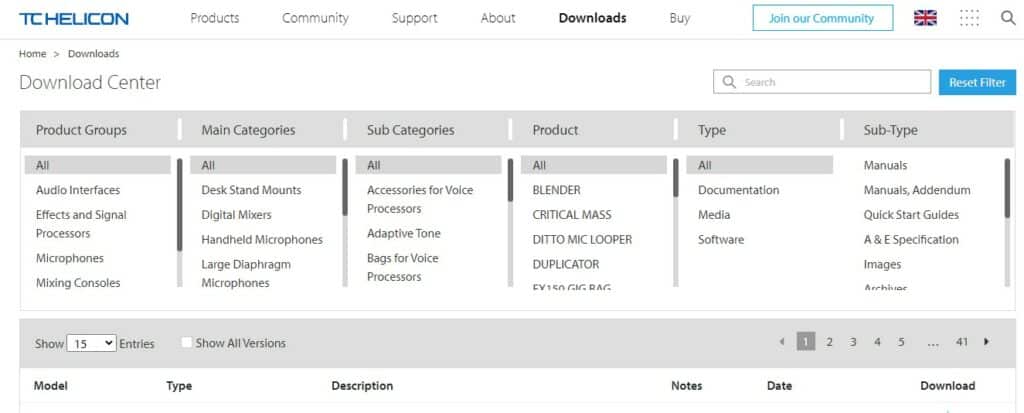
If you are done trying the troubleshooting tips of the software update and closing all the background applications, there is one other way where you need to reinstall VoiceSupport 2 and try your luck. The good news is that the size of the application is not that large, and it gets installed in a couple of minutes on your computer.
Visit the main panel and remove the current VoiceSupport 2 from the PC completely. Restart the computer and then head over to the TC helicon official page. Make sure you download the latest version of the application. As soon as the application is installed on your PC, connect the VoiceLive Play GTX and get it working.
- Other Tips
Whether it’s Mac or PC, people have been facing connectivity problems with the VoiceSupport 2 on a frequent basis. Basically, you need to check the USB cable because these cables come in the box, and every once in a while, you get a damaged cable. Just try another one. That’s the first step.
The second step is if your device has MIDI control or USB control, you need to make sure that you configure the USB stuff and the MIDI stuff the way the VoiceSupport wants it to be configured. You’ll have to check the manual on this, obviously. So look into the support side for the VoiceSupport and see the manual.
There are some settings in there, like for the boys left to you, make sure USB control is on and the SysEx ID is set to zero. In some of those more complicated devices, the settings are different. It seems silly to quote the IT crowd but have you tried turning it off and then on again? It actually works in some cases.
Reboot your computer, turn on the device, connect the USB cable and repeat the cycle. It’s a little bit finicky, but it usually solves the connection problems. An important thing to remember here is that the USB cannot power your device, so you have to keep it plugged in via your wall wart power supply.
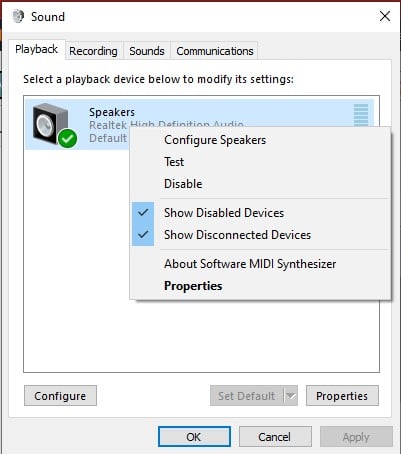
No matter what is going on with your device, it definitely needs to be powered up. As soon as you connect the device, it takes a couple of seconds to load the generic USB audio driver, and then you need to go to the control panel and see VoiceSupport, and it just doesn’t exist there.

So what really happens is when Windows 7 sees a new audio device, it just disables it by default. Now you have to enable it, which means you need to go to the control panel and then to your audio hardware. That’s where you can find a little playback and recording tab. In that tab, you will see the devices.
That’s where you have to enable the device. Right-click on VoiceLive Play GTX and enable it. The second hurdle to come over at some point is that sometimes the device is disabled, but it is also not even showing up in that list.
The trick with that one is that you can right-click inside that window, and there will be a little tick mark next to a box that says ‘show disabled devices. If that’s unticked, then that means that not only is the device disabled, but Windows just decided to not even bother showing it.
The disabled device is not shown because who would need to see a disabled device. So if you can get over that little hump often, that will help you connect to the VoiceSupport. There are so many systems, so much hardware and the sheer combinations of systems that make it really difficult for you to get any kind of catch-all answer for this problem.
This problem is a major one in Windows, and the other one in Mac is where the system is independent. The VoiceSupport needs to connect to your device directly. It has to have exclusive control over the MIDI and the USB connection to your device.
The reason is that it is going to be sending a bunch of firmware and complex stuff, and it has to really make sure it happens correctly. If you have a digital audio workstation or any of that kind of stuff and it’s up and running, it can grab hold of the MIDI or the USB for your device.
As a result, your VoiceSupport gets blocked from being able to connect. So that would be the situation where you go into ‘manage devices’, and you say ‘show devices’, and it shows ‘not connected’, but you know that it is connected right to the computer. In simple words, it means something has gotten in the way and taken control.
Most of the time, you can narrow that down to your DAW or some sort of interface like a workstation interface. You know a USB hub can sometimes get in the way, so if you’re not getting a connection at all, try different USB ports. Of course, the last try would be trying it on the computer.
Take the VoiceSupport to a friend’s house and use it on their computer just to see if it connects. Because if it doesn’t connect with any computer, you can guess that there is a setting within a unit itself that’s preventing the connection. In that situation, it requires you to get the immediate help of a qualified technician.
- Check VoiceLive Play GTX
If the unit still fails to get recognised by the VoiceSupport 2 software, then it is a good idea to check the power connections to the VoiceLive Play GTX. You need to make sure that the power supply to the unit is optimal.
If it is not, reset the VoiceLive Play GTX and get rid of this problem. Sometimes an issue that might seem huge can be simply resolved by power cycling the unit a few times.
- Contact TC Helicon
The problem of the VoiceLive Play GTX being unable to get recognised by the VoiceSupport 2 is a complicated one and the best way to resolve it is to reach out to the official TC Helicon customer support. They are great at narrowing down the cause of the issue.
This advice is specially directed at inexperienced users who are incapable of trying the troubleshooting tips. Secondly, it is best to involve the experts and avoid wasting hours trying to isolate the problem. All you need to do is visit the official page of TC helicon and send them an email explaining your problem.
They will reply to you as soon as possible with an effective solution to the problem. If that’s not sufficient, you can take the unit to a technician and get it repaired.