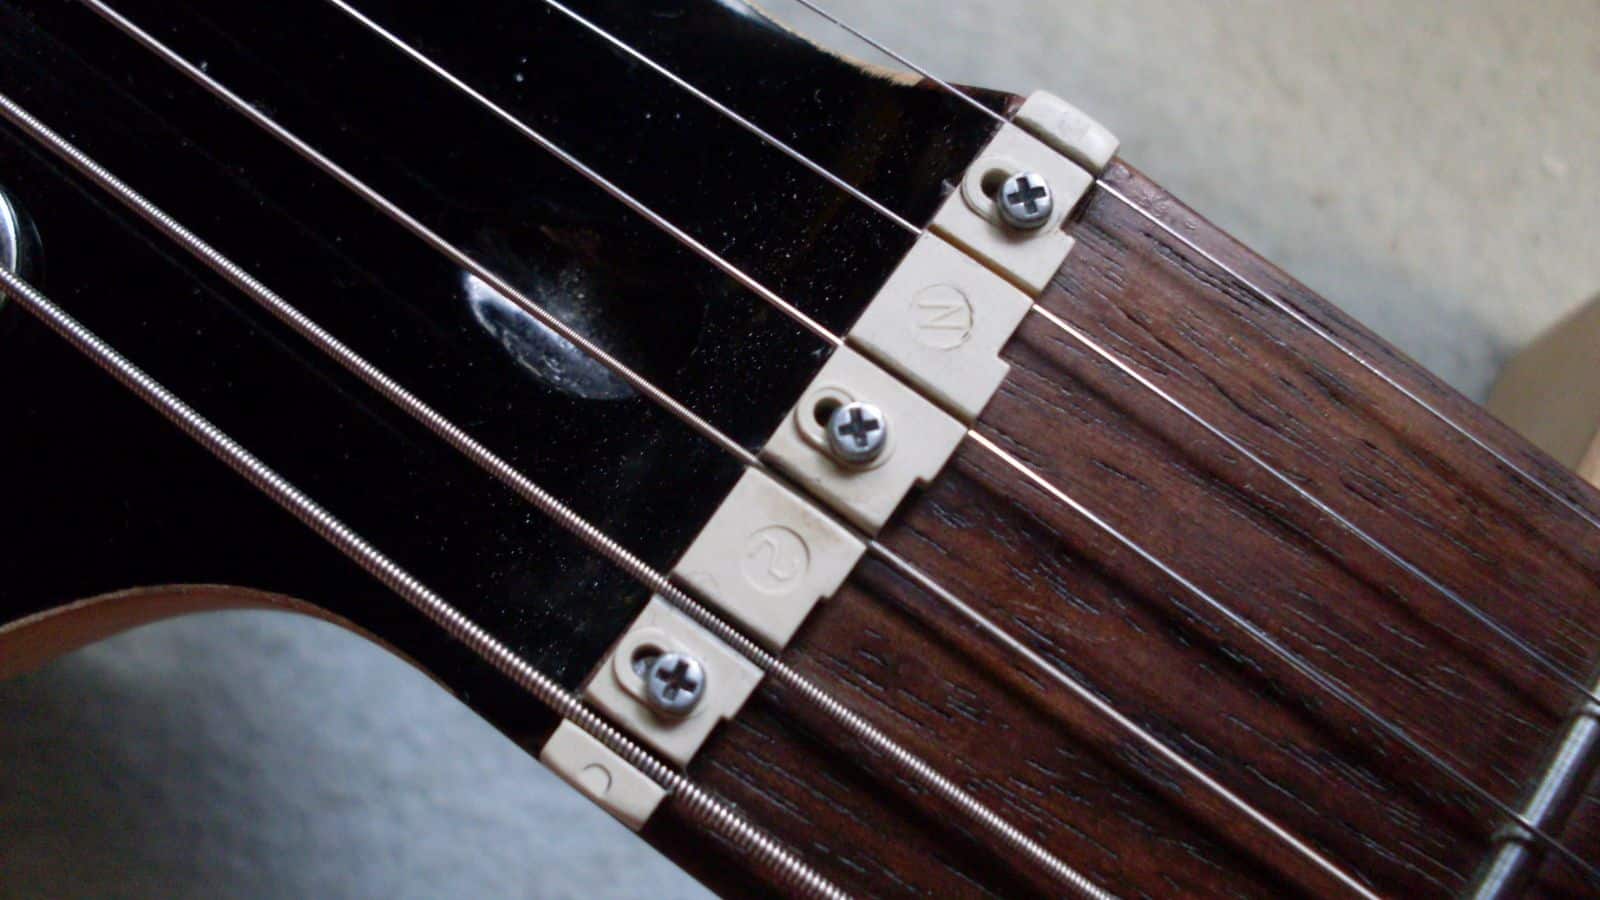
Earvana has gained popularity for the guitar notation technology that allows the musicians to have better control over the guitar. They have launched nuts that help create a compensated tuning system for the guitar.
In fact, this is a patented technology and can help with tuning. In addition, it compensates for every string individually and works well with every guitar, including the vintage guitars.
Even with all these amazing features, there are still some problems with this nut!
Most Common Earvana Nut Problems
1. Compatibility
The nut has been designed to work with every type of guitar, including the vintage guitars. This is because it can adapt to range string gauge, fretboard radius, and fret size.
However, it does not work with custom-made guitars very well. So, if you have a custom-made guitar, it’s best to opt for a standard tuning system because this nut won’t work.
2. Too Much Tension
If you are using the Earvana nut and there is excessive tension, it can negatively impact the tuning process.
In most cases, this issue incurs when the guitar strings are too tight. So, it’s recommended that you loosen up the strings – it will make the tuning process easier.
3. Getting Out Of Tune
Another problem is the nut getting out of the tune and the guitar will refuse to play in tune. In that case, you must check the fret spacing and string stretching.
The solution is to compensate for the stretch at the nut by setting the forward break-off point for the string. This is because it helps reduce the distance to the fretboard, which fixes stretching as well as spacing errors.
Secondly, you need to check if the strings are moving freely in a nut. In particular, you should play the guitar to inspect how smoothly the strings are gliding through the nut, and if the movement is restricted, you must contact the guitar technician.
4. Positioning
Proper positioning of the nut is essential because improper installation can negatively impact the intonation.
So, if the intonation and tuning are causing issues, inspect the nut’s position and make sure it’s not tilted on the back or in a forward direction (it must be in the center).
In addition to this, make sure that you aren’t using too much force while installing and positioning the nut.
5. Low Action
If you are using a vintage guitar with the nut, it’s likely to result in low action. The solution is pretty simple as you have to glue the material that matches the nut’s material and stick them together by adding glue on the bottom side.
Then, just sand the edges of the nut to make them smooth and file them before you install them on the guitar. As a result, the low action will be fixed.
6. Loose Nut
The Earvana nuts are prone to becoming loose, and if the nut has become loose on your guitar, you can simply use some wood glue to attach them.
It’s better if you don’t use permanent glue because you won’t be able to remove the nut in the future.
7. Nut Is Hanging The String
It’s common for guitarists to apply graphite or nut sauce in the nut slot for reducing the friction but these lubricants are likely to collect dirt, resulting in string issues.
The solution is to opt for a 1200 grit sandpaper for softening the nut’s edges on the front as well as the side.
In addition, you can soften the nut slot as well because it helps create a ramping effect. This softening will help eliminate the square edges, so the string movement is free and it doesn’t bind up.
Keep in mind that you should sand the nut and slot slowly to prevent excessive shaving.
8. Temperature Fluctuations
The guitar nuts are designed to contain the string and help determine the string spacing. For this reason, when the strings and guitars have a fluctuating temperature, you need to check the tuning as well as the nut.
First of all, make sure that the strings are properly connected to the nut and the nut is placed in the central area of the neck.
Once the nut’s position is corrected, strum the strong for a few seconds to warm them up, and then start tuning.
9. Dull Sound
The dull sound is usually associated with an overused or old string but it’s also caused by twisted strings. Since the nut holds the strings, one needs to check the nut to make sure it’s not twisting the strings.
It is recommended that you take off the nut as well as the strings and install them again. You must ensure that the strings are straight and aren’t twisted when they pass through the nuts.
On the other hand, if this doesn’t work, you should replace the strings.
10. Bad Intonation & Buzz
A damaged nut can result in buzz and bad intonation, which negatively impacts the pliability of the guitar frets. The high strings in the nut usually result in sharp intonations while low slots lead to buzz.
Ideally, the nut slot’s bottom must be a bit higher than the fret’s top. For checking the height of the nut slot, you have to hold the string down on the third fret and check how much it moves across the 1st fret.
If the string doesn’t move, the slot is low. In addition, if the string moves a bit, it has to be filed down.
So, if the nut sot is low and the neck has standard relief, you need to fill it in (baking soda or bone dust can be used for filling). In addition to filling, make sure that the slots are spaced evenly.
11. Loss Of Tone & Sustain
If the guitar strings are moving side to side in a nut, it’s likely that the nut’s slots are too wide for your guitar.
As a result, the string will start losing energy, which results in a loss of tone and sustain (it sometimes impacts the tuning as well). The only solution is to fill the slots or replace the nut with a new one.
12. Ping Noises
In case you are getting the ping noises when you tune up, it’s likely that the nut’s slots are too tight. It will not only create ping noises but can make it challenging to tune.
The solution is to file the nut slots but be careful while filing because you don’t want to create a low slot. For filing, you can opt for 800-grit sandpaper.
13. Tight Strings
The guitar strings are available in various gauges – the thick strings are installed on the nut base’s lower side and have to be at the same height as the string.
However, this makes the playability challenging as guitarists will need to press each string separately to ensure contact with the frets.
In addition, if the nut is placed too high, it will make it challenging for beginner guitarists to play the guitar.
The solution is to remove the nut and make sure it is installed at a surface level rather than above or below the fret to make sure the strings move freely and the nut isn’t too high.
14. Deteriorating Material
If the material from the nut has started coming off, it’s likely to be because of incorrect nut installation.
For instance, when the nut isn’t filed and installed properly, the constant movement will produce friction, which starts removing the nut’s material at a specific angle more than others.
So, if the material has started deteriorating, you can add some filler and correct the installation to prevent such instances.
The Bottom Line
Earvana nut is one of the best in the market for people who like to play with different types of guitars. However, the slightest error in installation can result in nut damage and loss of sound, so be careful about the installation.