
If you are a beginner guitarist, it’s important to have the learning tools since learning how to play the guitar is not an easy process. ChordBuddy is one of the easiest ways of learning to use a guitar as it’s installed on the guitar and teaches you chords. In addition, it comes with a true tone tuner that allows the guitarists to tune up their guitars.
In simpler words, it allows the users to create their own chords. However, ChordBuddy has to fit on the guitar to work properly. In case you are unable to fit ChordBuddy on the guitar, we have some solutions that you can try!
Steps To Follow When Your ChordBuddy Does Not Fit
- Check ChordBuddy
There is an array of learning formats available in ChordBuddy, so it’s recommended that you recheck the learning system model you have purchased.
That’s because there are separate models for right-handed guitars and left-handed guitars, so you’ve to purchase the learning system according to the orientation you prefer. Also, there are different models according to the neck and guitar size, so check carefully.
- Check Guitar Compatibility
To begin with, you must check the guitar’s compatibility before purchasing it. This is because ChordBuddy is designed to work on necks that are no smaller than 1.5 inches and no bigger than 1 7/8 inches. So, if your guitar’s neck is not sized in this range, it won’t fit properly.
It works fine with the majority of electric guitars and acoustic guitars and most people get this issue if they have a custom guitar. In addition to the neck size, you have to consider the guitar size as well. This unit works on the 5/8 and ¾ guitar sizes. On the other hand, if you have a ½ guitar, this learning system might not fit properly.
- Read The Instructions

In some cases, the ChordBuddy doesn’t fit when you don’t follow the correct installation process. We recommend that you consult the installation manual and follow the installation process accurately to make sure the system fits on the guitar.
However, if you are having a hard time figuring out the installation steps, you can reach out to the customer support team at 877-699-6188 between 8:00 AM and 9:30 PM. In addition to this, there is an online form available that you can fill and the customer support team will reach out to you.
- Check The Angle
To make sure the ChordBuddy is fitted properly, make sure that it’s mounted at the angle where the booties or grey feet are not touching the guitar strings. In particular, this angle should be created when the no-colored button is pressed.
In addition, the grey booties on the blue (G) tab have to be right above the third fret wire that passes through the neck. Once the proper position and angle have been achieved, you have to tighten up the thumbscrew tightly to make sure ChordBuddy is held in place. This angle not only ensures proper fitting but promises cleaner sound output.
- The Brass Nut
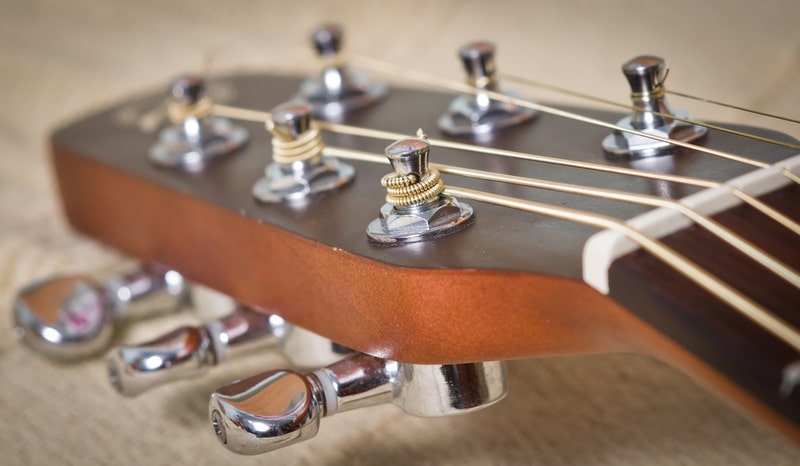
The ChordBuddy has been integrated with the brass nut that’s responsible to prevent stripping of the learning system. Most people don’t tighten up the brass nut properly, which results in fitting issues. So, check the brass nut and make sure it is tightened up or tighten it if it’s loose.
While you are at it, make sure that there is no rusting on the brass nut because it can damage the connections and damage the fitting. In case of rust or corrosion, you can use a contact cleaner to remove it or simply purchase a new brass nut from the hardware shape (be specific about the replacement brass nut’s size to ensure it fits in).
The truss rod is added to the guitar to balance out the tension to make sure the guitar’s neck is not bent with pressure. So, when the truss rod is not adjusted properly, it results in pressure issues which displace the learning system as well.
To fix this problem, you must check the truss rod and tighten it up in case it’s loose (you must tighten it until it’s fully snug). As a result, the guitar strings will become closer to the neck, which keeps the ChordBuddy in place and produces clean notes as well.
In addition to this, it’s best that you turn the truss rod in the counterclockwise direction because it keeps the learning system in place while keeping the string buzzing at bay.
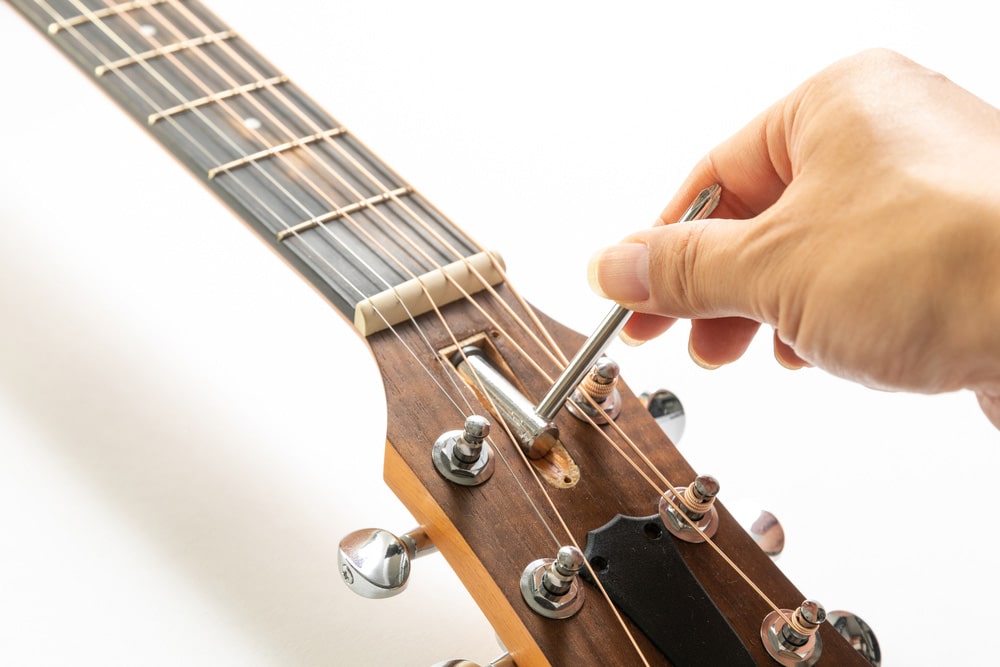
- Adjustment Of Guitar Neck
Since ChordBuddy is very specific about the neck, you need to adjust the neck to make sure the learning system is installed and fitted properly. To adjust the guitar neck, you need to use the Allen wrench, identify the Allen bolt, and spread the G and D strings.
Once the strings are spread out, insert the wrench and make a one-quarter turn in the clockwise direction. Then, let the wood rest for around ten minutes before you make more adjustments. This is because wood is a natural object and needs time for adjustment. Once the neck is adjusted, install the learning system, and it will fit in perfectly.
- Chords
This learning system has been designed to help beginners learn the chords. However, if you are complaining that the ChordBuddy doesn’t fit because you are unable to play the chords, it’s likely that you are using too many chords.
When you use the color-coded buttons, you can press a particular color to play a chord but one can only play four chords, including E minor, G, D, and C.
- Tuner
The learning system has been designed with a true tone tuner to make sure the strings are in tune. Keep in mind that the tuner must be installed before you put in the ChordBuddy. It’s recommended that you get the tuners installed by guitar technicians to make sure the tuner is fit in properly.
- Clamp
The learning system has been integrated with a clamp, which has to be mounted in place to make sure ChordBuddy fits firmly. The clamp is adjustable and is located on the top left side of the system. Honestly, the clamp is pretty small, which makes it challenging to tighten up.
Since this is an adjustable clamp, you can rotate it with a screwdriver to close it properly and make sure it’s fully attached to the guitar’s arm. Once the clamp is closed, it’s likely that the learning system won’t move from its place.
- Other Parts Of The Guitar
If you have installed this guitar learning system and it doesn’t remain fit when you play the guitar, it’s likely that some parts in the guitars are loose and are causing vibration – this vibration can adversely impact the fitting.
It’s recommended that you touch the guitar’s battery compartment, and if the vibration stops, the internal parts of the guitar are loose. Usually, these parts include loose machine heads, pickup, and input jack. So, get these components tightened up before you use the learning system again.
- The Action Height
In case the guitar strings are vibrating against the frets, it might disturb the ChordBuddy. This happens when the action height is too low (it’s basically the height difference between the frets and strings). The solution is to increase the action height to prevent the string vibrations and fit in the learning system again.
The Bottom Line
The ChordBuddy is one of the most effective and easiest learning systems. It’s a lightweight and small plastic unit, which is not only easy to use but easier to install as well. It can be used with electric and acoustic guitars.
The installation is pretty convenient but if it doesn’t fit, it’s recommended that you take the guitar and learning system to the guitar shop.
Bought chord buddy (classic) from Amazon and it Does not fit my 17/8 guitar neck, says it supposed to fit but doesn’t! I reckon I’m out 60$
How do you remove each individual tab starting with the red one?