Audacity is a widely used audio editing and recording software. It allows the users to edit, mix, and embed effects into the music tracks, making it perfect for musicians who like to create unique music. Since it allows the users to cut and edit the vocals, the musicians are able to tailor the soundtracks.
In addition, it’s open-source software, which eases the modification. However, some users have had issues in cutting the music files with Audacity but this issue is pretty easy to fix!
Fixes for Audacity Not Letting Me Cut
- Disable Layer Lock
Audacity has been designed with the layer lock feature that allows the users to lock the music files and layers. When the layer lock is enabled, it stops the users from using the editing features, including cutting (basically, you cannot make any changes to the track). So, if you are unable to use the cut feature, all you’ve to do is to disable the layer lock.
- Restart Software
In some cases, the cut command stops working because of a minor system bug. The minor system bugs are quite easy to fix as a reboot can take care of them. So, it’s recommended that you exit the Audacity software properly and turn off your computer.
Then, wait for a few minutes before you turn on the computer and open Audacity again. When the Audacity opens, try using the cut command!
- Clear Storage
Limited storage can also cause issues with the features and commands. To ensure a stable user experience, it’s recommended that you clear some storage on the computer and make sure there is enough RAM to operate the software. Ideally, you should have at least 2GB of extra storage space available on the computer for Audacity to work properly.
In addition to this, you must delete the temporary data files to make sure they don’t slow down the system! It is recommended to opt for a local drive and set the storage path to Audacity’s temporary directory and local hard drive because these drives are faster as compared to external drives.
Audacity tells the users how much longer one can record according to the space before it starts creating the errors, so keep an eye on the storage. If possible, you can also upgrade the RAM or processor to improve the performance and opt for a DMA mode for your hard drives.
- Update The Software
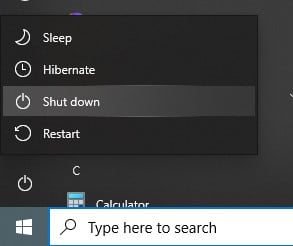
Updating the Audacity software is one of the most reliable solutions when the features stop working. So, if you are unable to use the cut command, it’s best that you update the software as outdated software can lead to this issue. To update the software on a Windows computer, you have to uninstall Audacity from the system.
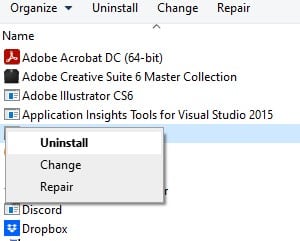
However, before you delete the software, make sure you exit it or it will lead to errors. The software can be deleted from the in-built uninstaller. For this purpose, you have to right-click on the Audacity, and choose the “open file location.” Then, double-click on the “unins000” file and it will start the file removal process.
You might have to confirm the uninstallation by pressing the OK button. When the files are deleted, reboot the computer, and reinstall the Audacity to make sure the latest version is installed. On the other hand, if you are using the Mac computer, you have to quit the Audacity app and drag it to the “trash”.
Audacity uninstallation will retain the settings for reinstallation. However, for downloading the updated version, you have to delete the previous settings as well. To clear the settings, you need to delete the Audacity folder for the app data.
- The Screen Redrawing
If you are using Audacity and the cut command isn’t working and the recording is skipping, it’s because Audacity is unable to write the audio to the hard drive quickly enough. To fix this issue, we recommend that you reduce the screen redrawing.
For this purpose, you have to open the track’s preferences and uncheck the “auto-scroll in case of unpinned head”. In addition to this, you should increase the buffer length to 100 milliseconds through the device preferences.

- Reduce The Audio Content
One of the best ways of fixing the cut command is to reduce the audio content that’s being written. From the quality preferences, you have to select the 16-bit sample format and make sure the recording channels are set to “mono” from the device toolbar. Selecting these settings will reduce the audio amount by 50%.
- Reduce The Computer Activities
Some features of Audacity will stop working when there are too many background processes on the computer, including the cut command. For this reason, it’s recommended that you exit as many processes and apps as possible.
In particular, you have to disable the antivirus programs to make sure the software’s temporary directory isn’t scanned as it can lead to performance issues. In addition to this, it’s best that you disconnect the computer from the internet connection.
- Disable The Windows Updates
When you are recording and editing the music and the Windows Update is downloading in the background, it will interfere with the cut commands and other features.
So, disable the Windows Update while editing and it’s best to create the software or hardware profile that only loads the essential services and hardware for the recording and editing sessions. While you are at it, it’s best to defragment the hard disk drive but always defragment the drive before using Audacity.
- The Drivers
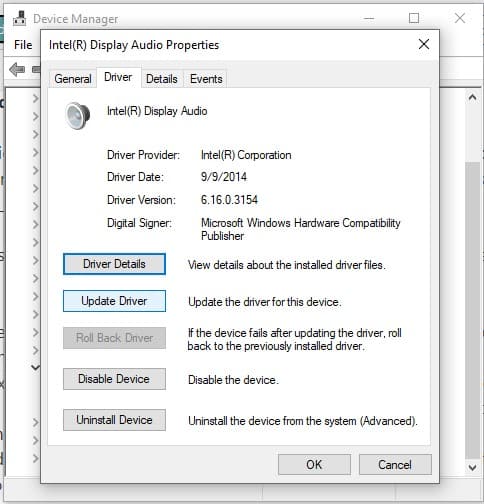
It doesn’t matter which audio device you are using with Audacity, it’s recommended that you check the drivers and update them to the latest versions.
Usually, the driver updates are automated, but if the new version has been launched but your device has the old one, it’s best that you reboot the device as it automates the latest version installation.
- Privacy Settings
The incorrect privacy settings on the Mac can hinder the users from using different features, including the cut command. In particular, Apple has recently changed the privacy settings for audio recording devices to make them more secure.
Apple is referring to the settings as mic but it implements to every recording device, such as Thunderbolt interfaces and external USB drives.
To resolve this problem, you’ve to open the system preferences, open the security and privacy tab, and go to the privacy tab. Now, tap on the microphone and select the box next to Audacity to make sure the mic can be used and you can edit the file.
- Power Save Mode
It’s common for people to enable the power save mode on their laptops to save the battery. However, enabling the power saver mode can restrict some features on the computer, and Audacity’s features will be limited as well. For this reason, if you are unable to cut the music files, it’s best that you disable the power save mode.
To disable the power save mode, you have to tap on the battery icon on the taskbar’s right side, choose the battery settings, and go to the battery saver section. Then, uncheck the box that says, “Turn battery saver on automatically”.

- Playthrough
To make sure you can listen to what you are recording and cut the music files, you have to disable the playthrough feature. In addition to this, you have to enable monitoring from the recording meter toolbar. This is because when the playthrough is enabled, it causes a delay in the features and recording input.
To disable the playthrough feature, you have to open the transport tab on the software, go to software playthrough, and toggle it off.
The Bottom Line
Cutting the music is common for musicians to customize the music track and add the desired effects. However, if you are unable to cut the music, you can try the solutions mentioned in the article. In case you need more assistance, there are various Audacity forums available.