The popularity of Audacity as a multi-track audio recorder and editor tool knows no bounds. Whether you are a vlogger or a podcaster, audio producer or video producer, you can readily get your hands on this software and get the most out of its easy-to-use features.
The best thing about this tool is its user-friendly nature. You can totally rely on its performance. It is quite common for audacity users to experience export problems with this software. In this article, we have mentioned a few suggestions that might help you if you are facing the same problem.
These troubleshooting tips are described in the order, the first one being the most helpful one. If that doesn’t work out, you can try the next one and so on.
Audacity Not Letting Export
- LAME File
While exporting an audio file in Audacity, if you get a prompt saying locate LAME dot DLL, copy the LAME dot DLL file in Audacity and download it. Once it is downloaded, start browsing it, select it and click OK. It is really easy, and this should work perfectly fine.
LAME is an mp3 encoder that costs nothing, but you must ensure that the website you are downloading it from is reputable. Another important thing that you need to take care of is that after the encoder is installed on your computer, you need to restart the device.
The best thing about this encoder is that it causes Audacity to complete the export even if the software is not running in its latest version.
- Resample The Track
The problem of Audacity crashing while exporting mp3s is quite frustrating. It is also common for Audacity to hang or take a long time to process. In most situations, the main reason causing this problem is the difference between your chosen project rate from the sample rate of the audio track.
Because of this problem, while the export is carried on, the system also resamples and thus, long tracks suffer from problems. What you need to do is resample the track to the project rate that you have picked before you export it as mp3. Click the track control panel and select the entire track. Visit tracks, followed by mix, and then mix and render.
There is a high chance that the end of the track might have added some accidental silence to it because of the resampling. However, there’s nothing to worry about because you can easily select it and remove it. After these steps, when you do the export of mp3, the process is quick and smooth.
If it is not, there could be a bunch of other causes behind it. For example, users with the virus scanner often face this problem because while the scanning of the created files is carried out, the process of export is extremely slowed.

- Check Memory
Sometimes the export failures are caused by simple memory issues. Therefore check on the memory first and make sure that the disc has some spare memory for the files. If there is a memory problem, you can cancel the unnecessary programs running in the background and thus free some memory.
- Unsaved Progress
Sometimes Audacity shows export problems even if the disc has ample space on it. In that case, you need to check on the unsaved progress in the system. Most of the time, users are working with particular audio, and they do not save it properly. It costs them a malfunction in the Audacity export.
If you have any such unsaved progress, get it saved and then check the activity of the export function on Audacity.
- Muffled Audio
There are some issues in the Audacity that can result even if you have been using this software for many years. The export problems in Audacity appear even if the software has been working great all along.
You might face the problem with the change in the sound of the audio from crispy to muffled while the audio is being exported into the WAV format. It can happen even if there hasn’t been any change in exporting settings. If you reset all of your Audacity settings once or twice, it can still bring no results.
The first thing that you need to do is try to diagnose the export function by using different formats for the export and then comparing them with the original one. The reason is that if there is a loss in high frequencies, it can give rise to muffled audio.
- Restart
The operation of Audacity is smooth most of the time, but it can also go haywire without any obvious reasons. As time passes, most of the hiccups on Audacity get resolved without any troubleshooting, but you can still expect long-lasting disruption from some of them.
Talking about the most important functions of this software, exporting files is definitely on top of them. Hiccups affect this function the most as the entire software is plagued. Therefore, you definitely need to take hiccups into account whenever you face this problem.
Launch the Audacity software and go to the tools. There you will find the restart configuration. As you select it, it will get back the default settings in Audacity and thus get rid of the majority of the hiccups.
Additionally, it is a good idea to get your computer restarted. As soon as the screen appears, you can determine the capability of Audacity in exporting the files.
- Check Out The Name
Users usually ignore scanning the name of their files, and eventually, it leads to an export problem. If your file name is not in accordance with the naming rules, it causes violations and thus a failure to export the files. Experts recommend that the name of the files should be free of periods so that hassles can be avoided in the future.
- Adjust Project Rate

There have been situations where the exported mp3 turned out to be invalid, or it won’t play. Most of the time, it gives an error because its size is too small, i.e. a few bytes. The solution to this problem is straightforward. All you need to do is keep the setting of your Project rate to 44.1 kHz.
It is mandatory to check the Project rate before you do the export. The reason is that if a file with another sample rate is being imported, it can bring a change in the project rate to its own rate. You can use the default sample rate setting for this purpose.
There will be an automatic down sample of the sample rate from 44.1 kHz to a lower rate of 56 kbps by LAME. The thing about low bit rates is that their quality is pretty poor. If you pick the command line exporter in Audacity, you can choose your desired but valid sample rate combination.
- Problem With The Sound And File Size
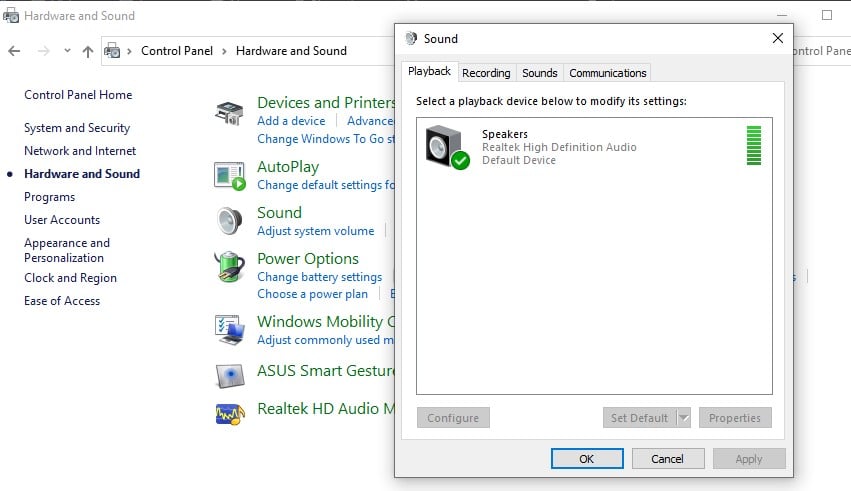
Another export problem in Audacity includes the absence of sound in the exported mp3. You might see that the exported mp3 is playing because of the moving timer, but it may lack the sound. The first thing that you need to check is that the sound device is not set on mute.
You also need to be sure about the use of a correct playback device. You can check that in the system control panel or by visiting the player preferences. If there is nothing wrong with the playback device, go to the Audacity and check the gain slider. It is located near the mute/solo buttons on the track control panel.
It must be set at Gain: 0 dB. In case it moves towards the left position, it can bring a reduction in the volume of the exported mp3 or its total diminishing. In some cases, users have faced the problem of importing an MP3 file and then finding its size to be larger after the export is done.
The possible reason behind this problem is the difference in the bit rate of export from the one with the original file. Usually, the default setting of the bit rate of Audacity is 128 kbps. If you make any changes, Audacity can bring back the bit rate that you used the last time.
There are a few steps that you can follow to get the exported mp3 in the same size as it was before.
-
- Open the file in Windows Media Player and check the bit rate of the imported file. If you are using Apple iTunes, you need to right-click over the file and select the option of getting info. It is recommended to use standalone programs like MediaInfo.
- Open the option of the file followed by export as mp3.
- You will see another ‘options‘ button. Click it. If an mp3 that is already in its low bit rate is exported at the same bitrate as the original one, there is a certain deterioration in its quality. If the bit rate of the export is higher, it creates a larger file, and it makes the file merge tools incapable of joining the new mp3. If an mp3 that has a high bit rate is exported at the same bit rate, you prevent the quality loss, but there is nothing saved in terms of file size.