Zero Fret Position Calculator
Lay out the zero fret as the true scale start, then calculate the first fret, guide setback, saddle reference, slot window, and crown clearance.
Layout Breakdown
| Fret | Center From Zero | Slot Window | Remaining Scale | Ratio |
|---|
| Instrument | Scale Length | First Fret From Zero | 12th Fret From Zero | Typical Frets |
|---|---|---|---|---|
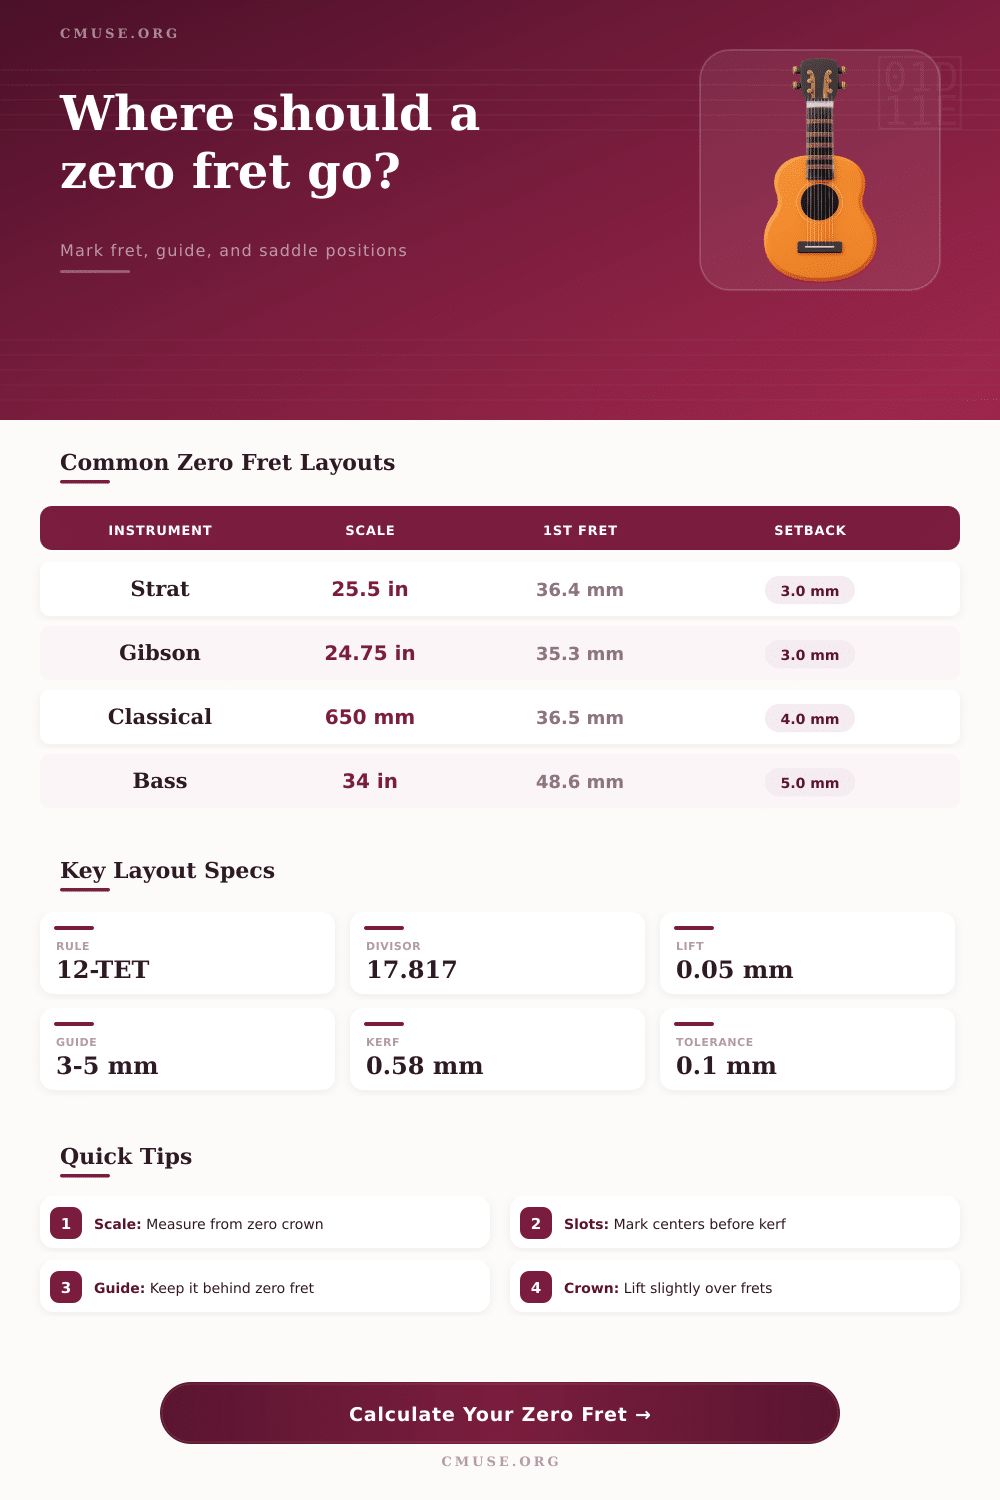
| Fender-style electric | 25.5 in / 647.7 mm | 36.35 mm | 323.85 mm | 21-22 |
| Gibson-style electric | 24.75 in / 628.7 mm | 35.29 mm | 314.33 mm | 22 |
| PRS-style electric | 25 in / 635.0 mm | 35.63 mm | 317.50 mm | 22-24 |
| Classical guitar | 650 mm / 25.59 in | 36.48 mm | 325.00 mm | 19 |
| Long-scale bass | 34 in / 863.6 mm | 48.47 mm | 431.80 mm | 20-24 |
| Concert ukulele | 15 in / 381.0 mm | 21.38 mm | 190.50 mm | 12-18 |
| Instrument Type | Guide Setback | Crown Lift | Clearance Aim | Layout Note |
|---|---|---|---|---|
| Electric guitar | 2.5-3.5 mm | 0.03-0.06 mm | 0.04-0.08 mm | Low action |
| Steel acoustic | 3.0-4.0 mm | 0.05-0.10 mm | 0.06-0.12 mm | Harder attack |
| Classical guitar | 3.5-4.5 mm | 0.06-0.12 mm | 0.08-0.15 mm | Nylon travel |
| Electric bass | 4.0-6.0 mm | 0.08-0.16 mm | 0.10-0.20 mm | Wide strings |
| Mandolin | 2.0-3.0 mm | 0.02-0.05 mm | 0.03-0.07 mm | Short scale |
| Layout Type | Open String Datum | Guide Role | First Fret Math | Best Use |
|---|---|---|---|---|
| Zero fret | Fret crown | Spacing only | Scale / 17.817 | Even open tone |
| Standard nut | Nut slot edge | Height and spacing | Nut to fret one | Traditional builds |
| Compensated nut | Shifted nut edge | Intonation offset | Adjusted per string | Fine intonation |
| Retrofitted zero | Added fret crown | Back guide | Must preserve scale | Nut action fixes |
Few players will ever know it exists, yet it’s one of the most appreciated innovations in instrument making: the zero fret. In a nutshell, it replaces traditional nut with a functional fret wire and makes the open string a fretted note instead of a dead one. That simple change alters the placement of your strings as well as scale length measurement.
Because of this, accuracy is more important at this point than anywhere else on the neck. Every fret up the board take its cue from your datum point, which if off by a single millimeter, results in an inherited error. And the math starts compounding fast. A small error at the headstock become intonation issues halfway down the neck.
Why the Zero Fret Matters
It’s an easy concept to misunderstand but really quite simple. When dealing with a “regular” instrument, the scale length is measured from where the strings touch the nut (on the front edge) to where they touch the saddle. But when there is a zero fret, that distance are measured from the top of the fret wire itself (i.e., its crown). Behind it is simply a string guide and not where the music begins.
What makes this so important is that it change all of the geometry of the instrument. Rather than fighting for space with a fixed nut slot, you’re now dealing with the relationship between two fret surfaces that need to be in perfect alignment. Consider then: What does each of these variables control?
Once you have your bridge set, scale length is not negotiable… It anchors everything else. First fret position are governed by the twelve-tone equal temperament system and subject to a strict logarithm rule. If you want to take things into your own hands, there are some exponential decay formulas you can wrestle with but thankfully, the calculator up top takes care of all the math after plugging in your scale. All you need to do is trust that dividing your scale by seventeen point eight will give you that critical first gap.
Setback is where personal preference meets mechanical necessity. Setback is measured as the distance between middle of the zero fret to the face of the string guides. So if your setback is large, it allow for greater space to wrap your strings around your posts without having them bind up and affecting their tuning stability (on tremolo systems). Tighter setback means a shorter neck and maybe something a little more compact to hold in hand.
With this tool you can play with those numbers before ever making a groove cut. If you’re building a bass and want to keep some meaty strings, you probably want that extra millimeter or two so they don’t bite into each other too much. On a small mandolin, you could really cinch it down without worry.
Clearance targets are the things that affect how it will feel when you play it. For instance, the zero fret crown needs to be just high enough to have some action on open strings without being so low as to cause the string to bump into the following fret and be buzz free on fretted notes. Too little and the open chords is muffled and dead sounding. Too much, and it’s sluggish and difficult to finger.
Typically, finding this sweet spot is more of an art, trial and error (in the shop). But it can also be a logical starting point as opposed to total guess work with a target calculation. There are also reference tables provided on the page as a sort of sanity check for your layout. This is a good way to see what the normal tolerances are by tradition for classical, Gibson, and Fender instruments.
If you build a Stratocaster, you may be willing to use tighter tolerances. A classical guitarist, however, might require more vertical travel if he is going to use nylon strings. So it’s not a hard rule but an established norm where decades of play testing has helped establish these numbers. The breakdown will help you see where your custom inputs fall in relation to industry standards. And it makes sure you’re not going into unknown territory for no reason.
Be patient and have a steady hand; slot marking can be tricky. Mark the mathematically exact center point first, then consider the width of your saw. An off-center line nearer the headstock will impact on every note you play and sound much worse then one higher up the fingerboard. It amplifies through the entire harmonic series. Patience now would of pay off when you need to get back to pitch later on.
All of this leads up to the point that the zero fret is consistent. It gives the open string the physical respect it deserves alongside every other note. These tools let you lay everything out precisely and eliminate the guessing game from construction. You no longer have to rely solely on feel, but instead you begin to engineer an instrument that will play itself. It is the difference between something that sounds ok and something that comes alive in your hands.