True Bypass Loss Calculator
Estimate pedalboard capacitance, treble rolloff, cutoff frequency, and where a buffer changes the loss.
| Cable Type | pF/ft | pF/m | Use In Calculator |
|---|---|---|---|
| Low-capacitance instrument cable | 18-24 | 59-79 | Bright rigs, long runs, passive pickups |
| Typical modern guitar cable | 28-35 | 92-115 | Most pedalboards and rehearsal rigs |
| Coiled or high-capacitance cable | 45-60 | 148-197 | Vintage darkening or short direct runs |
| Short pedalboard patch cable | 25-40 | 82-131 | Use total patch length, not each patch |
| Pickup Or Output | Typical Source | Cap Sensitivity | Calculator Setting |
|---|---|---|---|
| Active guitar or buffered pedal | 0.5-5 kΩ | Very low | Use buffer output impedance |
| Bright single coil | 40-70 kΩ | Moderate | Start near 50 kΩ |
| Passive humbucker | 70-120 kΩ | High | Start near 90 kΩ |
| Passive bass pickup | 80-150 kΩ | High | Start near 110 kΩ |
| Placement | Pickup Sees | Best Use | Caution |
|---|---|---|---|
| No buffer | All cable and pedals | Simple short rigs | Treble loss rises fast |
| First in chain | Guitar cable only | Long board and amp runs | Some fuzzes react differently |
| After early pedals | Guitar cable plus first pedals | Fuzz, wah, vibe before buffer | Patch length still matters |
| Last before amp | Board cable and patches | Protects long amp cable | Does not fix board loading |
| Rig | Pedals | Total Cable | Typical Result |
|---|---|---|---|
| Direct guitar to amp | 0 | 15-20 ft | Usually clear with normal cable |
| Small blues board | 3 | 24-30 ft | Light loss without buffer |
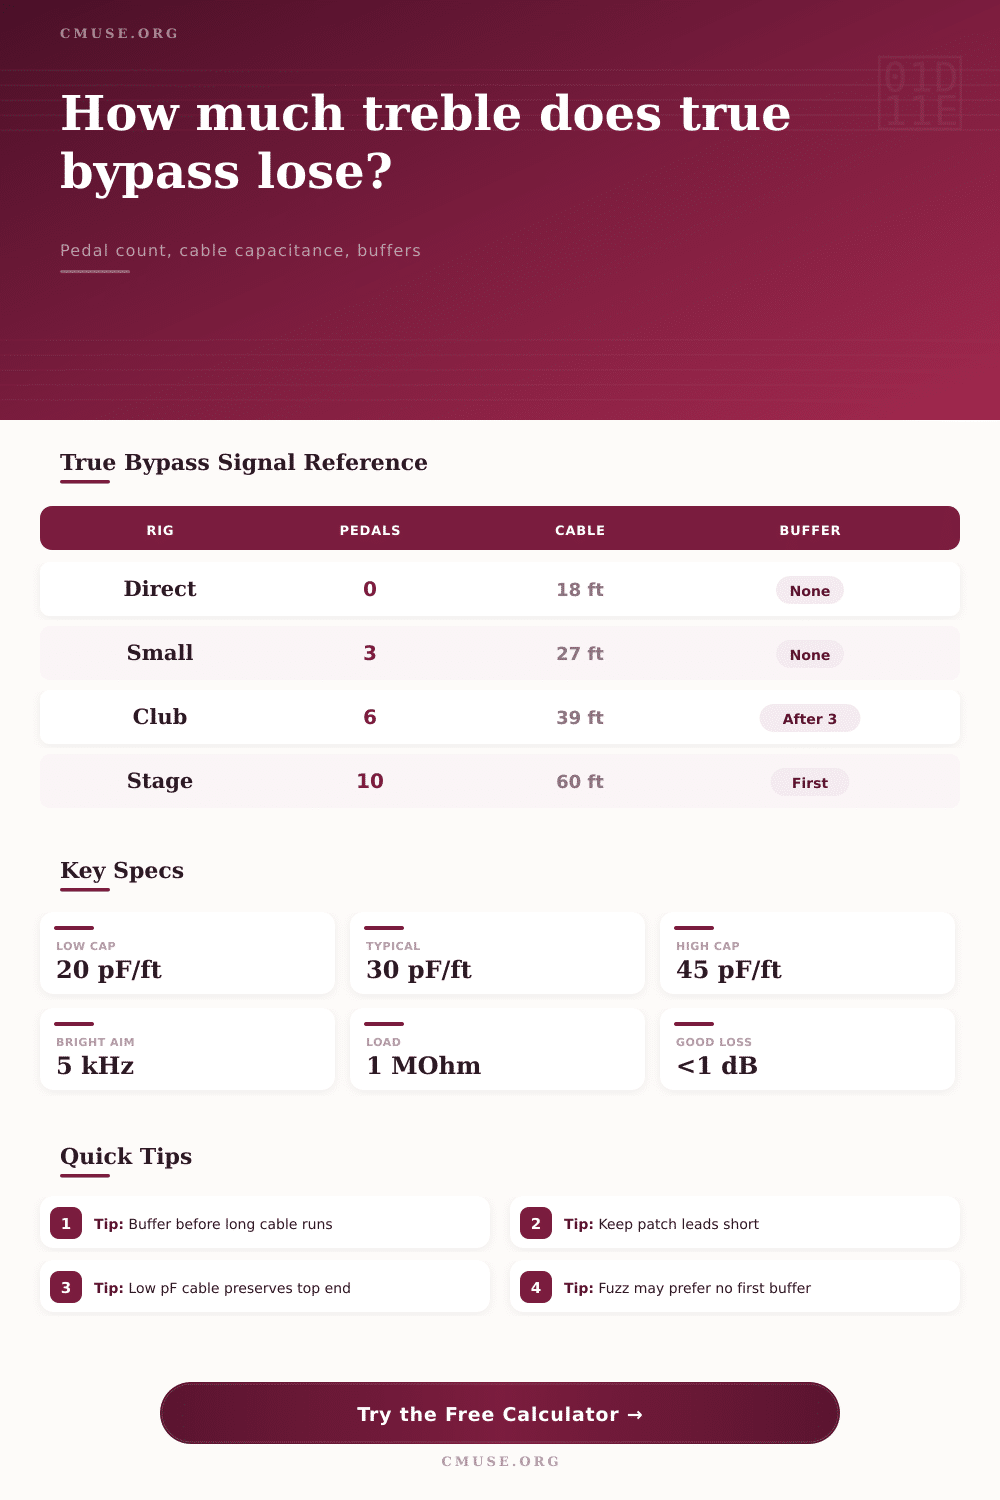
| Club pedalboard | 5-7 | 35-45 ft | Often benefits from one buffer |
| Large ambient board | 8-12 | 45-65 ft | Buffer placement is critical |
Rather than measuring something, it’s more about how things feel. You spend three hours building a board and plug in your guitar. Your cables are new, your pedals look new but the sound of that chord is dull. It feels like somebody has put a towel on top of your head. The room? It might be. The amp? It might be. Even the guitar? Maybe.
Often it’s the cumulative effect of a pile of capacitance between pickup(s) and the speaker. True bypass switching is honest. When the pedal is off there’s no active thing touching the signal. And true bypass switching also brings with it a mechanical simplicity that creates an invisible load and murders your high end, There is an invisible load. It’s not rocket science but it’s enough to make your head spin.
Why Your Guitar Sound Gets Dull
Passive pickups can be thought of as little generators fighting against impedance load. When you stack effect pedals in series, the total capacitance increase because of their true bypass switches. Small amounts add up fast. Add into the mix the main cable going out to your amp and patch cables connecting each piece, and now you’ve got yourself a low-pass filter you didn’t ask for.
Enter your number of pedals and length of your cables into that calculator and it will do the math for you. That way you don’t have to guess if something about your rig is loading signal down.
Cable length is an overlooked factor for most player in this equation. Many times we think of a cable as a passive wire, simply transmitting voltage from one location to another. This is not true on audio frequencies. An instrument cable behaves as if it’s a capacitor. It stores charge and rolls off higher frequencies based off its length. A short six-foot lead doesn’t seem harmful. But stringing ten pedals together with an eighteen-inch patch cord between each one results in thirty feet of internal cabling before the signal ever exits the board. The combination of this internal run coupled with your pickup output resistance create a filter curve that will eat treble faster then most people realize.
How you position buffers will alter that loading to your pickups. Since a buffer has low output impedance and high input impedance, it basically cuts off passive elements that follow it. So if your buffer sits first in line your pickups are only seeing the capacitance of whatever cable lies between your instrument and the board. Everything else in your rig is now electrically out of the picture when it comes to tonal load.
On the flipside if you buffer last then all your pedals and patch cables is still being driven by your pickups as they make their way to safety. This is why some folks believe that the last thing you need to do is add a buffer. They think your signal loss issues will be solved. It doesn’t address source impedance at all.
There’s one more level of nuance not completely measurable with numbers: vintage circuits. A few wahs and fuzz faces is built to load down a bit under high impedance passive pickup. That’s part of how they dynamically respond. Putting a buffer right after the guitar will certainly clean up the highs, but also run the risk of making those vintage tones harsh or sterile. It’s a tradeoff. Sure, you may get clarity up around 5 kilohertz, but you’ll also lose non-linear compression that made the pedal musical in the first place.
Surprisingly, that’s where cable quality comes into play. There’s a reason there are low capacitance cables. A capacitance of twenty picofarads per foot instead of forty-five allows much higher end frequencies to pass through the cable. When you’re playing with bright single-coil pickups and running lengthy amounts of cable, you’ll notice the difference quick. Switching from an inexpensive but high-capacitance cable to a low-profile variety will bring back presence while not adding anything active to the equation. It is a simple piece of hardware that makes big difference.
It’s a game of connections, but once you understand those connections it is no longer guesswork; it becomes strategy. Instead of just piling on pedals willy-nilly, you think about signal flow like an electrical circuit. With the reference tables they provide, you can visualize what happens with your signal as it travels through various combinations of pedal rigs. For example, if you have a six-pedal club board, often there will be a need for some sort of buffer, typically somewhere in the middle, to maintain top end. On a huge ambient rig with twenty pedals maybe you need buffers at more than one point to avoid complete signal collapse.
This isn’t about getting rid of all capacitance. This is about understanding how capacitance works so that you can control it rather than it controlling you. It’s about recognizing relationship between your wire, your switch and your pickup as the source of your tone. Where do you lose some treble? Where do you put it back in? Use the calculator to get the map, then listen for destination.