Parallel Compression Mix Calculator
Blend a dry signal with a heavily compressed copy to find the combined dBFS level, the gain added by the blend, the wet contribution and the softened effective ratio
Full Calculation Breakdown
| Mix % Wet | Dry Weight | Wet Weight | Combined dBFS |
|---|---|---|---|
| — | — | — | — |
| Mix % Wet | Dry Weight | Wet Weight | Description |
|---|---|---|---|
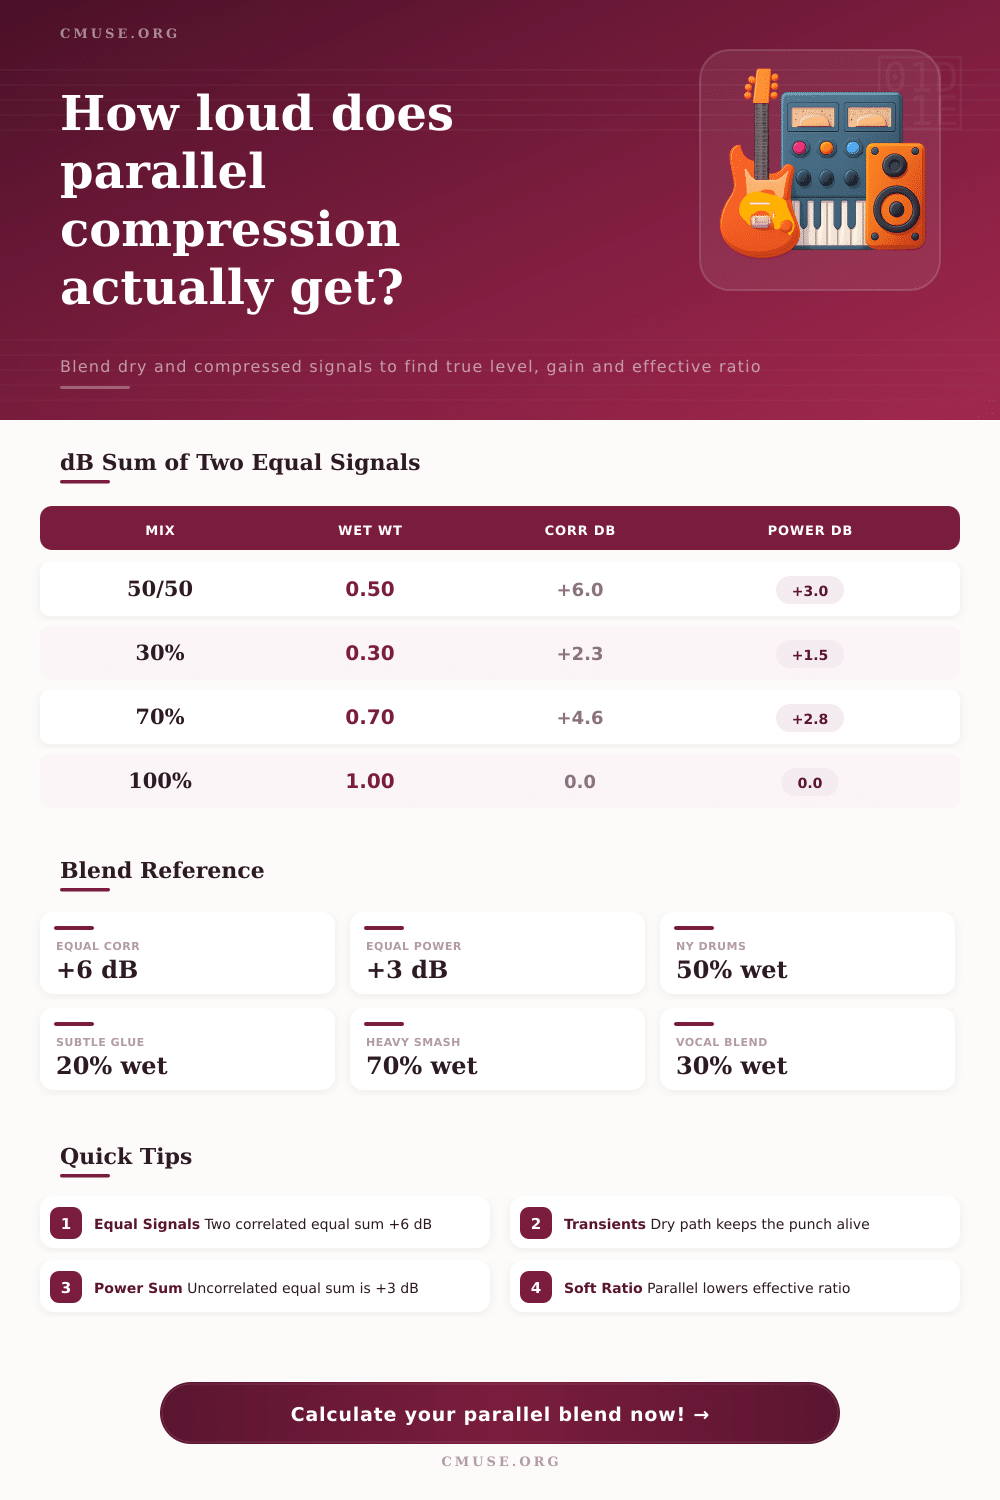
| 0% | 1.00 | 0.00 | Fully dry |
| 15% | 0.85 | 0.15 | Light glue |
| 20% | 0.80 | 0.20 | Subtle blend |
| 30% | 0.70 | 0.30 | Vocal parallel |
| 50% | 0.50 | 0.50 | Classic NY blend |
| 70% | 0.30 | 0.70 | Heavy smash |
| 100% | 0.00 | 1.00 | Wet only |
| Number of Copies | Correlated (in phase) | Uncorrelated (power) | Note |
|---|---|---|---|
| 1 signal | 0.0 dB | 0.0 dB | Reference |
| 2 equal signals | +6.0 dB | +3.0 dB | Doubling |
| 3 equal signals | +9.5 dB | +4.8 dB | Tripling |
| 4 equal signals | +12.0 dB | +6.0 dB | Quadrupling |
| 10 equal signals | +20.0 dB | +10.0 dB | Ten copies |
| Wet Ratio | 30% Wet | 50% Wet | 70% Wet |
|---|---|---|---|
| 4:1 | 1.23:1 | 1.45:1 | 1.74:1 |
| 8:1 | 1.29:1 | 1.60:1 | 2.13:1 |
| 10:1 | 1.30:1 | 1.64:1 | 2.27:1 |
| 20:1 | 1.32:1 | 1.71:1 | 2.50:1 |
| infinity:1 | 1.33:1 | 1.79:1 | 2.78:1 |
On paper, the New York trick seem easy enough: a loose drum track gets fed into an aggressive compressor and then blended back into original dry source. In theory this creates a fat and punchy mix with no loss of impact on the snare. In reality the effect is less predictable for human ear when trying to anticipate how decibels will stack up when merging a compressed signal with original sound.
This calculator takes the guess work out of level blends and lets you concentrate on tone instead of trying to do mental maths whilst your monitors is cranked up to 11. However, where it gets tricky is knowing how those signals combine; everyone assumes that mixing a loud dry signal with a quiet wet signal will simply make it slightly louder. But that’s never really the case because when you mix two similar correlated signal together at the same amplitude, the combined level suddenly increases by six decibels. That’s double what we perceive as volume and can easily sends your master bus into orbit if you’re not cautious.
Why Use This Parallel Compression Calculator?
The calculator does all the combining math for you, whether two signals are perfectly in-phase or somewhat uncorrelated, like stereo width elements. And it precisely reports the additional gain being added to the blend so you know exactly how to compensate ahead of time to avoid clipping. You don’t have to fret over power summation mistakes or phase cancellation when tool plots the actual output level.
Another important consideration is the effective ratio, because using parallel compression creates a softer dynamic curve different than you would get using each of these compressors alone. For example if you apply an eight to one ratio to your wet path and then mix that back in at only twenty percent then the system as a whole behave far more gently. It maintains the sustain filled with compressed energy yet retains the transient from dry path. Even extreme ratios when blended low soften a lot as the reference table on page shows. This explains why subtle blends can often be better than heavy ones. You still have the body but not the destruction of attack.
While dialing in that mix knob will only get you so far, it’s important to set your input levels properly as well. Many engineers will simply keep things clean by setting both inputs to -12dBFS right out of the gate. When you’re mixing something for real, however, your compressed signal will typically be run hotter, compressor increases the overall level on average. To account for this reality, the plugin provides ability to enter a gain offset in the field, which shows what happens when your dry input is three decibels quieter than your wet bus. If you don’t account for the offset, your blends will feel thinner or less present than you intended once they are placed in mix.
One final factor is that result will be different when using certain types of source material. For example, dry drum hits has a high correlation value because they are very similar to their compressed versions. They are occupying the same frequency and time space and adding together the voltages. But if you mix a stereo instrument with a processed version of itself that has been shifted or widened, the two signals will not match as closely. The signals would instead sum in power not voltage, giving only a small three-decibel increase in gain for equally loud sources. Choose the correct mode and the resulting level should represent what will occur in your mixer bus.
It can take time to find your sweet spot. As you get used to using compressor, you may begin with that good old fifty percent wet setting so you can hear the max effect. Then, pull it back until the punchy sound starts returning. In some cases, you need a heavier hit than others. Sometimes ten percent of something just adds glue and harmonic saturation. The beauty of this is that you adjust the mix percentage and immediately see the shift in levels that will allow you to try the scenarios above fast. What was once an abstract sound you wanted to achieve becomes a real number to aim for. You could of achieved it much faster with this.
In summary, then, parallel compression gives you density in the ‘body’ of a sound whilst preserving transient information (in other words), it puts the control into your hands. It doesn’t decide creatively for you; instead, it takes away the technical friction that impedes experimentation. Knowing precisely how much headroom you have to consume, you can push ratios further and blend more freely. This gives your ears confidence instead of making you worry about accidentally peaking. It also brings clarity to a technique that has been somewhat mysterious since it was first used in large recording studios decades ago.