Compound Radius Calculator
Project a guitar fretboard radius from nut to bridge, then find the local fret radius, string-span arc drop, and setup reference numbers.
Projection Breakdown
| Fret | Distance From Nut | Local Radius | String Span | Arc Drop |
|---|
| Profile | Nut Radius | Bridge Projection | Typical Feel |
|---|---|---|---|
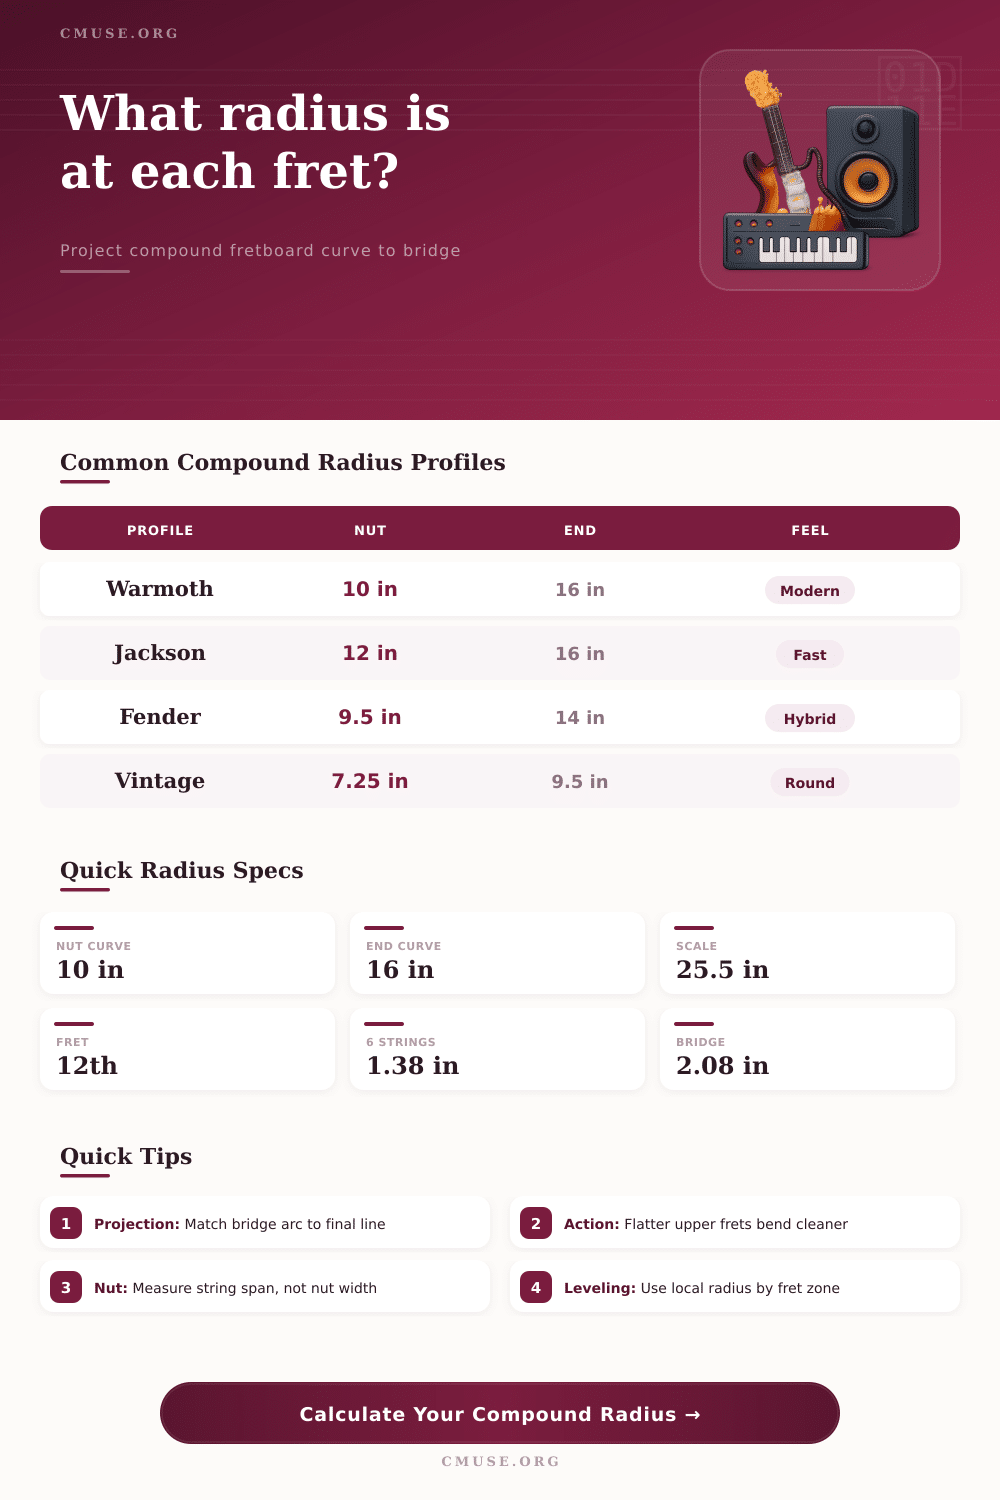
| 10-16 modern compound | 10 in / 254 mm | 16 in / 406 mm | Comfortable chords near the nut with flatter upper bends. |
| 12-16 performance compound | 12 in / 305 mm | 16 in / 406 mm | Fast lead feel, common on shred-style guitars. |
| 9.5-14 hybrid compound | 9.5 in / 241 mm | 14 in / 356 mm | Modern Fender-style compromise for chords and bends. |
| 7.25-9.5 vintage blend | 7.25 in / 184 mm | 9.5 in / 241 mm | Round low positions with gentler high fret choking control. |
| 14-20 extended range | 14 in / 356 mm | 20 in / 508 mm | Very flat response for wide string spans and low action. |
| Setup Point | What To Match | Why It Matters | Calculator Cue |
|---|---|---|---|
| Nut slot arc | Nut radius and nut string span | Open-position chords feel even when the first-position arc follows the board. | Use the nut result, not the 12th fret radius. |
| Fret leveling beam | Local fret zone radius | A compound board changes gradually, so upper frets need flatter treatment. | Read the fret table near the work zone. |
| Bridge saddles | Bridge-line projection | The saddle arc should follow the string plane after the radius has opened up. | Use the bridge-line card and spread value. |
| Bend clearance | Arc drop plus action height | Flatter high frets reduce note choke during wide bends. | Compare selected fret sagitta across string span. |
| Instrument | Nut String Span | Bridge Span | Spacing Note |
|---|---|---|---|
| 6-string electric | 1.35-1.42 in / 34-36 mm | 2.05-2.12 in / 52-54 mm | Common tremolo and hardtail range. |
| 7-string electric | 1.67-1.75 in / 42-44 mm | 2.44-2.56 in / 62-65 mm | Wider span makes sagitta more visible. |
| 8-string electric | 2.00-2.12 in / 51-54 mm | 2.83-2.99 in / 72-76 mm | Very flat bridge projections are common. |
| 4-string bass | 1.35-1.50 in / 34-38 mm | 2.20-2.36 in / 56-60 mm | Radius often feels flatter because span is wide. |
| 5-string bass | 1.70-1.90 in / 43-48 mm | 2.75-3.15 in / 70-80 mm | Bridge spacing can dominate the projected arc. |
| Radius Type | Geometry | Upper-Fret Feel | Best Setup Use |
|---|---|---|---|
| Constant radius | Same curve from nut to end | Predictable, but round boards can choke under low action. | Traditional setups, vintage replicas, simple leveling. |
| Compound radius | Radius increases along the scale | Flatter high frets help bends while low frets stay comfortable. | Modern electric guitars and precise saddle projection. |
| Conical fretboard | String plane follows a cone section | Bridge arc naturally opens wider than nut arc. | Builders setting radii from actual string spread. |
| Near-flat board | Very large radius, small sagitta | Fast lateral movement, less chord-hand wrap. | Extended range, low tunings, touch-style setups. |
So why do compound radius guitar necks? It’s a solution to a particular issue. Your hand feels good but the string digs deeper into higher frets and chokes the note as it try to sustain. How come? Because the geometry of board is working against you.
As it wraps around a chord, the neck starts out round at the nut for comfortabley fretting. Gradually it taper off to a flat shape nearer the bridge to keep bends clear. The calculator do the math for you after you enter target curves and scale length of your instrument. You won’t have to guess what that transition will look like down the length of fretboard.
Why Use Compound Radius Guitar Necks?
It’s all about physics. When you play chords by shaping them against the guitar surface, your hand help you follow slight curve toward back of the guitar. Typically this was seven and a quarter for older designs and around ten these days. But then when you push a string up two or three frets for a lead line, that same curve become a trap. That curved surface creates a trap where the string leaves the flat plane of your fingerboard and plunges into space between the fret wires.
The solution came from a compound design where radius increases gradually downwards the length of the neck. So the feel stays constant, no jarring jump. It’s important to understand that there are three different radii for every guitar. These is the local radius at each fret, the bridge projection, and the nut radius. Unfortunatly, many player think the numbers refer to overall board dimensions. So they think that a 10-16 means it’s ten inches wide at one end, then sixteen at the other. Nope! That change take place across twenty or twenty-four inches of scale length.
The fret calculator details the local radius at say the fifth, twelfth or twentieth fret so you can see exact curvatures. This is important because if you’re leveling your own frets, you can’t take a straight beam to whole neck. You’ve got to match the local curve. If you apply a ten inch radius template to higher frets on a compound board, you’ll be taking off too much wood. This creates flat spots that will buzz as you play open chords.
Another point of confusion is string span. From the nut to the bridge, the fan of the strings combined with design of the saddle alters the width of the strings. Even though they may have same radius, if there’s more distance across two outer E strings (more string spread), then even a big-radius fretboard will have less arc drop and feel flatter. This is why extended-range guitars with seven or eight strings commonly employ super-flat radii, fourteen to twenty inches. If you maintained a snug ten-inch curve on an eight-string guitar, the outside strings would be so far off the fretboard they’d be hard to play effectively.
The table on page lists some common profiles and helps you see where manufacturers is weighing comfort versus speed of performance. Then there is simply matter of getting it set up. Set your bridge saddles so they follows the projected radius along line of the saddles rather than the radius at end of the fretboard. The fretboard does not always go all the way to the bridge. It usually stops well short of where strings meet the bridge. This means if your saddles don’t align with plane of the strings, you’re going to have some intonation problems. Some string will feel significantly higher than others. It is just a little bit of geometry that makes or breaks a setup.
In conclusion, selecting a compound radius is all about compromise. Do you need more curve on the bottom to sound warm with chords, or do you want plenty of flatness on top to play clearly? No magic number exists, just one that suits your playing style and hand size. Vintage players may prefer rounder boards and go for slightly higher action to prevent fret buzz. Shredders may insist on a flatter surface to get more room for bending notes. The tool simply helps visualize this trade off and allows you to make an informed decision before modifying or buying a board.
You should of checked the math first. The geometry of your instrument explains what makes some guitars seem more playable than others. Math isn’t magic, it’s just math applied on a combination of steel and wood. Knowing how the radius increases as you move towards bridge helps you understand how various set-ups will intersect that curve. Once you become aware of that, you begin approaching set-up and maintenance with greater precision and less guesswork. Your hand meets less resistance against board, providing support from the first chord to last bend.