Delay Compensation Calculator
Work out the per-track plugin delay compensation (PDC) offsets needed to align every track to the highest-latency track – convert samples to ms, find the master timeline shift and round-trip monitoring delay
Full Compensation Breakdown
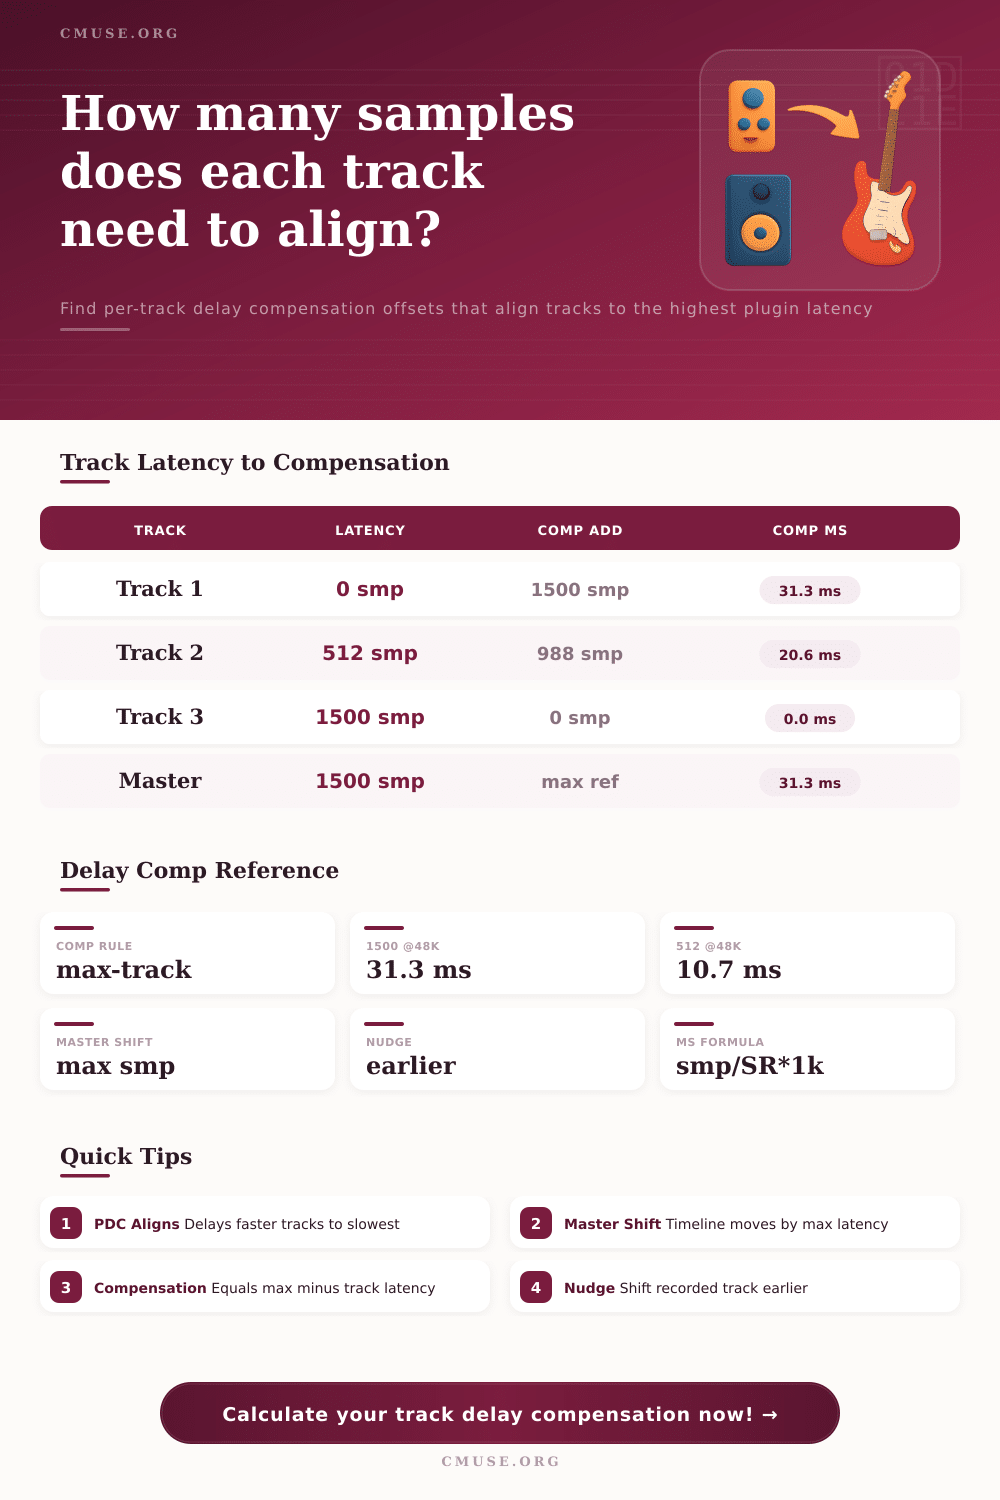
| Track # | Latency (samples) | Compensation Added (samples) | Compensation (ms) |
|---|---|---|---|
| — | — | — | — |
| Samples | ms @ 44.1k | ms @ 48k | ms @ 96k |
|---|---|---|---|
| 64 | 1.45 ms | 1.33 ms | 0.67 ms |
| 128 | 2.90 ms | 2.67 ms | 1.33 ms |
| 256 | 5.80 ms | 5.33 ms | 2.67 ms |
| 512 | 11.61 ms | 10.67 ms | 5.33 ms |
| 1024 | 23.22 ms | 21.33 ms | 10.67 ms |
| 1500 | 34.01 ms | 31.25 ms | 15.63 ms |
| 2048 | 46.44 ms | 42.67 ms | 21.33 ms |
| 4096 | 92.88 ms | 85.33 ms | 42.67 ms |
| Plugin Type | Typical Latency | Samples @48k | ms @48k |
|---|---|---|---|
| Dry / zero latency | None | 0 | 0.0 ms |
| Minimum-phase EQ | Very low | 0–64 | 0–1.3 ms |
| Compressor lookahead | Low | ~256 | ~5.3 ms |
| Linear-phase EQ | High | 1024–4096 | 21–85 ms |
| Multiband / mastering limiter | High | 1500–2048 | 31–43 ms |
| Upsampling / oversampled | Variable | 512–3000 | 11–63 ms |
| Track Latency | Max Latency | Compensation Added | Comp ms @48k |
|---|---|---|---|
| 0 smp | 1500 smp | 1500 smp | 31.25 ms |
| 256 smp | 1500 smp | 1244 smp | 25.92 ms |
| 512 smp | 1500 smp | 988 smp | 20.58 ms |
| 1024 smp | 1500 smp | 476 smp | 9.92 ms |
| 1500 smp | 1500 smp | 0 smp | 0.0 ms |
That’s because you’ve recorded yourself hitting a snare drum and it sounds just right, until you play back the mix and the snare seem to be just a little bit off the beat. It is a little too loose against the kick. But that’s not you. That’s your plugins. The new software instruments, coupled with moddern audio interfaces, have a small amount of latency (delay) between you playing a note and hearing it. When tracking in real time, it’s a nightmare. On playback, it can go unnoticed if your DAW properly compensates for plugin delays.
Knowing how the DAW aligns those helps keep your drum tight and avoid phasing issues. It works in theory. But doing it yourself by hand can be a little tough. Here’s the deal: When your DAW loads all the plugins on a track, it notes their reported latency. It then looks through all the tracks in the session and finds the maximum number. It use this maximum as the new anchor for the timeline. Then it moves all the other tracks forward or backward based off the difference between their own latency and the maximum.
How Plugins Change Your Drum Timing
So if I have one vocal chain loaded up with a serious linear-phase EQ that adds 1500 samples of delay, all the rest will be nudged back to match it. And it’ll do this even though they may not need any delay. To make sure you know how far to push things around, the calculator up top will convert the sample amounts into milliseconds, which give you a clear picture of amount of movement required.
Because if you don’t get things aligned, it creates what’s called comb filtering, a hollow phasing sound that muddles the mix. There’s a hidden variable: Sample Rate. Each sample is just a single point in time, and you can change how long they are based off your project settings. In a typical session, a sample take about point zero two milliseconds at 48 kilohertz. At 96 kilohertz, that duration halves. That means a thousand sample latencies sounds twice as long in high-res sessions.
When troubleshooting timing problems, many engineers forget about this conversion factor. “Oh, that’s not that many samples,” they think. “I’ll ignore it.” Later, they realize the cumulative delay across multiple tracks has knocked the rhythm section out-of-phase with the guide track. The chart on the page explain this plainly. Six-four samples translate into one point three milliseconds at standard studio rates, or zero point seven at higher resolution.
Typically, these days, it’s all about linear-phase equalizers. By design, those devices takes audio and process it evenly around every single frequency point. That means looking ahead into the data stream to keep the phase in sync. It adds a lot of latency. Dry tracks and minimal-phase plugins don’t add any. Lookahead compressors add some but less so.
So now you’ve got your snare track as dry but then you’ve EQ’d your kick and added a full two tenths of a second to its timing. Not good because your snare isn’t hitting the same time anymore. So what does the DAW do? It delays the snare for you. What happens if your monitor buffer can accommodate this increased load? You’ll hear sweet FA wrong. What if it can’t? Guess what you begin to hear? You will hear echoes while you’re tracking.
The usual solution to this problem is freezing tracks during your intensive mix session. Bouncing the plugin chain to an audio file removes the latency completely. No more compensation from the DAW. It require less CPU power. Round trip monitoring delay is reduced. This is very helpful if you are using oversampled saturation plugins or multiband limiters that can easily add hundreds of milliseconds of latency. Yes, you’re stuck without the ability to tweak real time. But you also have stability. It is a choice between performance and flexibility.
Manual nudges are sometimes the better option different than automatic compensation. Sometimes you may have one track with a buggy plugin causing a wrong latency report. Rather than have the whole session shift automatically, you’d like to force it back into line manually. In this case, you could avoid the auto system altogether and surgically correct just that one region by nudging it forward/backward in samples. This allows for total control on your timing while leaving the other tracks intact. You will need to listen carefully, often using transients as reference points to ensure things are lining up properly.
So in summary, delay compensation in plugins is one of those invisible tools that make your mix stick together. You seldom know it’s there unless it isn’t working or you misinterpret the sample-to-millisecond conversion and your timing gets off. Being able to know how many milliseconds each plugin adds to your signal path helps plan your signal chain better. Try to put heavy phase linear processing on buses as opposed to individual instrument tracks where possible. Make sure your buffer size is set before tracking. A thousand samples is not just a number, but a chunk of time that throws off a groove. Tighten the chain and the timing falls into place.