Pro Tools is almost synonymous with digital audio workstations (DAWs). The software is lauded by music composers and producers and is used regularly by professionals to record and edit audio.
Pro Tools carries tons of different features from audio recording and manipulation with effects to instrument recording, MIDI libraries, audio mixing, and much more. Both Windows and macOS users can benefit from this incredible DAW.
However, because Pro Tools packs several complex features that need to be configured in the right manner, it has a bit of a learning curve and can present some frustrating issues. It’s important to do the audio editing with precision to get the best results from this software.
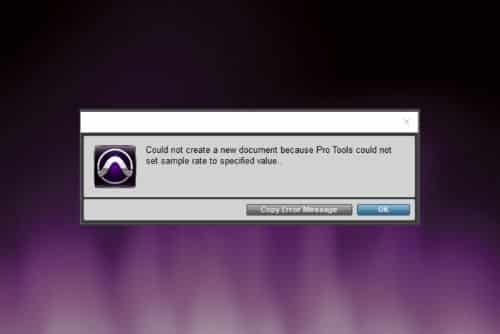
A common issue that occurs when you’re not running Pro Tools correctly is a pop-up stating “Could not Complete Your Request because Pro Tools Could Not Set Sample Rate to Specified Value” comes on the screen every time you try to save or play a file.
This can cause you problems in opening old music sessions and creating new ones as well. Luckily, as with other common Pro Tools errors, this problem is nothing to worry about and there are many efficient fixes that can help you solve this dilemma in no time. We’ve mentioned all of them below.
Additionally, before you begin reading, it’s best to try and relaunch the Pro Tools app or restart the device to check if the problem is simply coming up because of the app running for a long time. If the issue persists, then you can move on to our detailed troubleshooting guide.
Could Not Complete Your Request Because Pro Tools Could Not Set Sample Rate to Specified Value
1. Check Playback Engine
If you’ve recently started seeing the “Could Not Complete Your Request because Pro Tools Could NotSet Sample Rate to Specified Value” error come up on your screen, especially after updating the app, then you need to check your playback engine.
A playback engine is the one that would load your audio data for you while you work on Pro Tools. Fixing its settings should be prioritized. To begin, launch your Pro Tools app, then go into the Setup tab found on the taskbar. Click on playback Engine there. A dialog window will appear.
Now check the current engine- sometimes, ProTools automatically sets an incompatible engine for your device. For example, you may spot Pro ToolsAggregate I/O as the default when it’s not supported by AVID OS X.
You can find many engines in the drop-down menu. You can choose Mbox 2 from here. Afterward, restart the software and it should run fine. If the issue appears again, move on to the main configuration fix.
2. Configure Sample Rate
A wrongly set sample rate is the likely cause of this issue, and configuring it and changing it to a different sample rate can solve the problem in most cases. But what exactly is a sample rate?
Well to put it simply, a sample rate is the number of times per second the DAW takes a sample of your audio track. Think of samples like snapshots- a snapshot is taken for one part of the audio wavelength at one instance.
So if you have an audio project with, say a sample rate of 48kHz, then that means that your audio is being sampled 48,000 times a second. The higher your audio sampling rate is, the better quality your audio will render.
This happens because the highest frequency you can render is around half of the sample rate. If these frequency values are too high for the sample rate, then the “Could Not Complete Your Request because ProTools Could Not Set Sample Rate to Specified Value” can pop up
Exceeding this threshold can also cause aliasing, where blips appear on the audio spectrum.
So now that you understand how sampling rate works, you can choose the right sampling rate for your session by checking the frequency you want to render and then selecting a value that’s around half of the sample rate. You can do it through the configuring methods we’ve given below.
Changing Sample Rate For New Project
This is the simplest way of changing the sample rate. If you want to record a new session or rerecord the one with sampling rate failure, follow these simple steps:
- Start by creating a new audio session in Pro Tools.
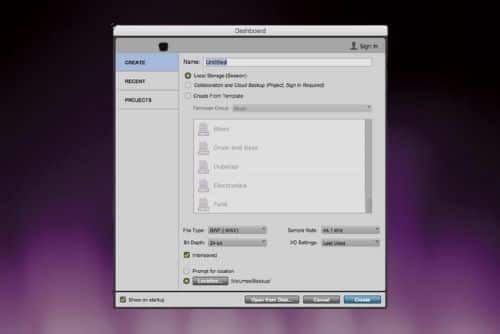
- The New Session option box appears. Locate the drop-down menu with the sample rates. This is found in Session Parameters.
- Choose the sample rate you want from the list of options available. Pro Tools gives you 6 sample rates- 192, 176.4, 96, 88.2, 48, and 44.1 kHz. 44.1kHz is good for composing podcasts or music as it’s the standard. Audio for movies, advertisements, and TV shows that requires a surround sound should be rendered at 48kHz. Be sure to keep in mind your final playback device when picking a sample rate.
- Hit the OK button. Now your session will sample at the desired audio rate.
Changing Sample Rate Of Existing Project
Ok, so now you understand how to solve the “Could Not Complete Your Request because Pro ToolsCould Not Set Sample Rate to Specified Value” problem by changing the sample rate of a new project. But what if you had to edit an existing project?
Unfortunately, configuring the sample rate of an existing session isn’t as simple as choosing a sample rate and hitting Convert in Pro Tools.
The best way to go about rendering a project is to save the copy of your existing session as a new session, then choose a different sample rate when creating the new session. Follow these couple steps:
- Launch Pro Tools.
- Open the existing session you want to edit.
- Go to the File option then pick Save Copy As.
- A Save Copy option box appears.
- Set a sample rate for your new session here, as you would with a new project. Afterward, click on Save Session Copy.
Configuring your sample rate should solve the issue. In case it doesn’t, then that means there is some other problem with either the software or your device, and it’s not a settings issue.
3. Reinstall
If the “Could Not Complete Your Request because Pro Tools Could Not Set Sample Rate to SpecifiedValue” error keeps popping up and you’re unable to make your DAW work, then some software files may be corrupted.
In that situation, the best thing to do would be to reinstall the software on your PC. You can do this by first getting rid of the source folder, then restarting your PC, then downloading the latest Pro Tools update.
If you bought Pro Tools with a paid account, you probably have a license and can log in, so there’s no worry about needing to pay again. This is a hassle and you may lose some sessions if they’re stored locally, but reinstalling can clear all issues for you.
Other Small Fixes You Can Try
Keep seeing the “Could Not Complete Your Request because Pro Tools Could Not Set Sample Rate to Specified Value” error? Try a few small fixes mentioned below and see if they make the problem go away.
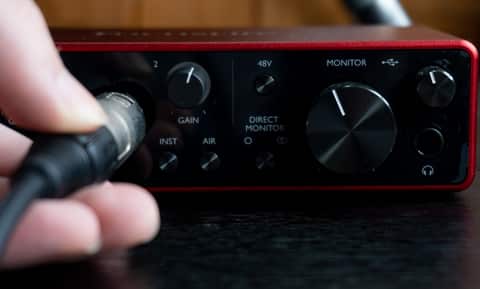
- Reload the set drivers for your audio interface.
- Unplug all interfaces from your PC and restart it. Change the interface cable to a new one.
- Unplug your web camera, or plug it in after booting up Pro Tools. Avoid putting a webcam orits mic in your Audio MIDI setup.
- If you have a Mac PC, restrict it from suspending or sleeping when the interface is connected. Set your PC to Never Sleep in the Energy Saver settings. Reboot your Mac PC after changing your sleep preferences.