Clip Headroom Calculator
Work out headroom to your ceiling, gain available before clipping, crest factor and analog dBu margin from your peak and RMS levels – in digital or analog
Full Calculation Breakdown
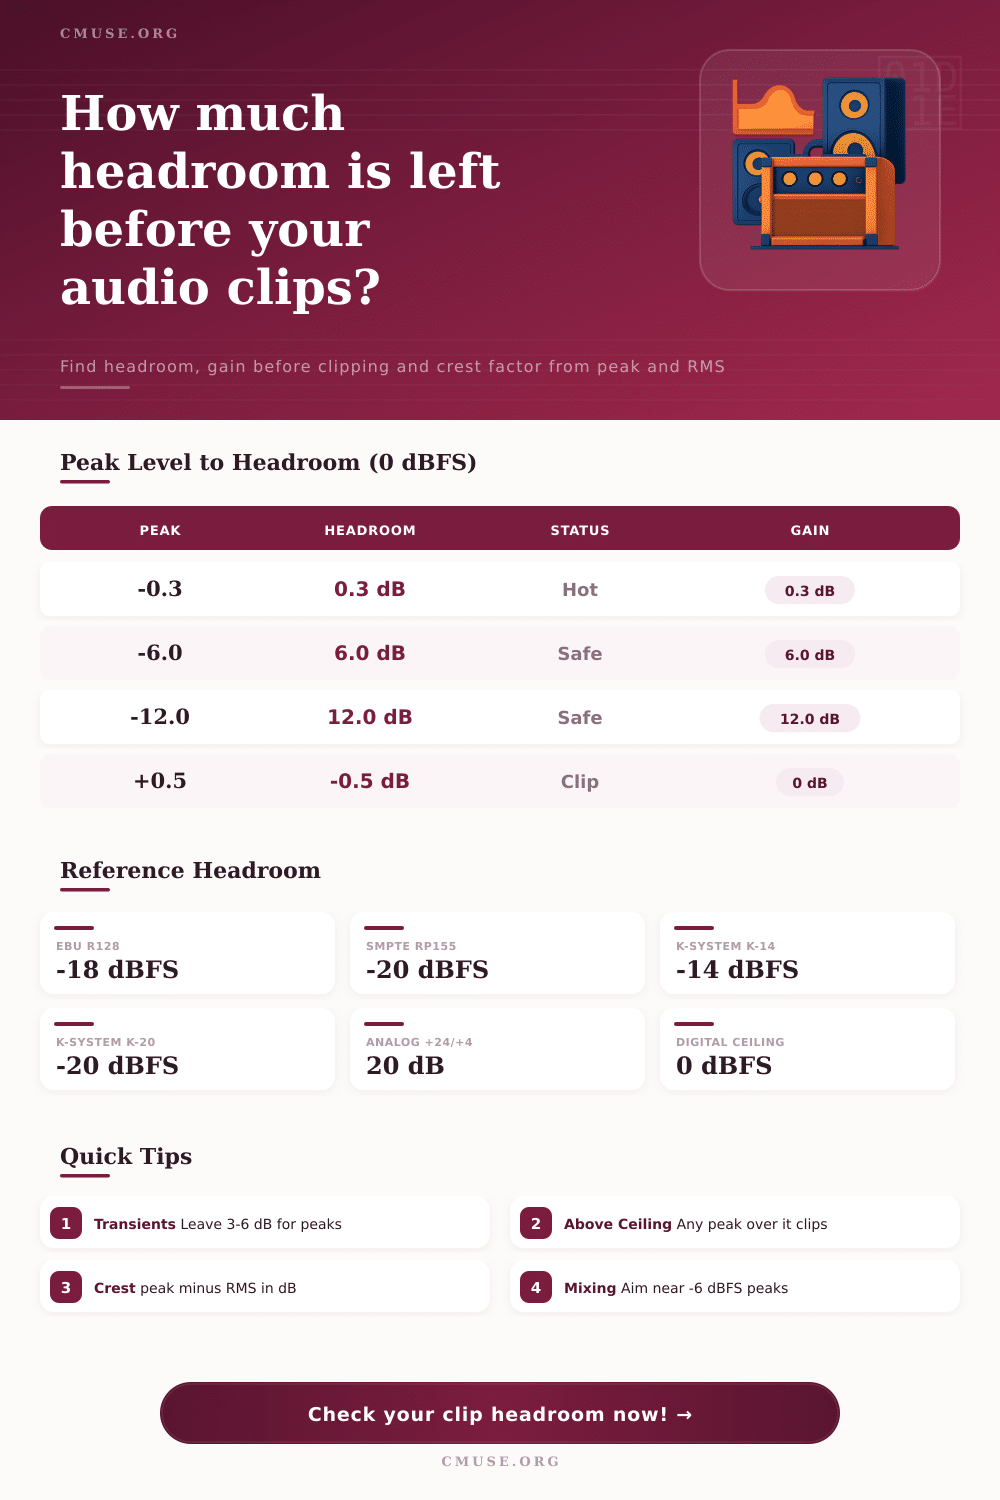
| Standard | Alignment | Headroom to 0 dBFS | Use |
|---|---|---|---|
| EBU R68 / R128 | -18 dBFS = +4 dBu | 18 dB | EU broadcast |
| SMPTE RP155 | -20 dBFS = +4 dBu | 20 dB | US broadcast / film |
| K-System K-12 | -12 dBFS = 0 VU | 12 dB | Loud / broadcast |
| K-System K-14 | -14 dBFS = 0 VU | 14 dB | Pop / rock mastering |
| K-System K-20 | -20 dBFS = 0 VU | 20 dB | Film / wide dynamics |
| Peak (dBFS) | Headroom to 0 | Gain Before Clip | Status |
|---|---|---|---|
| +0.5 | -0.5 dB | 0 dB | Clipping (over) |
| -0.3 | 0.3 dB | 0.3 dB | Hot / risky |
| -1.0 | 1.0 dB | 1.0 dB | Loud ceiling |
| -6.0 | 6.0 dB | 6.0 dB | Safe mix target |
| -12.0 | 12.0 dB | 12.0 dB | Conservative |
| -18.0 | 18.0 dB | 18.0 dB | Tracking level |
| Clip Point | Nominal Level | Headroom | System |
|---|---|---|---|
| +24 dBu | +4 dBu | 20 dB | US pro / SMPTE |
| +22 dBu | +4 dBu | 18 dB | EBU alignment |
| +18 dBu | +4 dBu | 14 dB | Some interfaces |
| +16 dBu | +4 dBu | 12 dB | Tight headroom |
| +6 dBu | -10 dBV | ~16 dB | Consumer gear |
You know that sinking feeling when you hit play on a mix and hear that harsh digital crunch right in the chorus? Sure, it’s annoying (but it’s also a planning failure). While you agonize about balance and tone, you often neglect to think about headroom. There’s a huge difference between leaving room for peaks and creating a distorted mess.
This little box visualizes how much margin you’ve got before your signal reaches the ceiling. And it turns abstract dBFS numbers into solid safety buffers for your session. The difference between top end of what you can play in a system and the top end of what it will tolerate is headroom. For digital audio, that maximum (the ceiling) is always 0 dBFS. Pushing analog sound sources like vacuum tubes or tape will does so gracefully, but a digital converter clips them in an instant. The wave form are ruined beyond repair with one sample too far. This makes digital a binary process. There’s no guessing your way out.
What Is Headroom and Why It Matters
Before any processing, know where your peaks is sitting compared to zero. This is a comparison of Peak versus RMS. You may see these as just dry numbers, but it’s telling you something about dynamics. Crest factor = difference between these two number. The peak number represent the highest instantaneous voltage. The RMS number represents the perceived loudness of that sound over time. So a high crest factor indicates your audio has some big transients that shoot up way above its average volume. And if you don’t understand this relationship and mix only by the RMS meters alone, you’ll end up clipping when those transients occurs. This will help avoid the trap of cranking up the limiter to save a clipping track. It will also keep life in the performance.
Calculation is important but so is context. Different industries align differently for a reason: live dialogue and other unpredictable sounds, such as news, can spike dramatically. This is why broadcast standards (smpte rp155, EBU R128) provides substantial headroom. Explosive sound effects in films frequently demand even further margin. Sometimes pop music masters deliberately push toward the limit, for that commercially loud sound. So understanding the world you’re working in does determine how much actualy buffer you should of had. The page has clear reference tables that lay it all out. Rather than guess from whatever worked last week, you can follow industry norms.
The other wrinkle here is that voltage isn’t binary when dealing with analog gear. You’re interfacing with a mixing console; you’re thinking in dBu rather than dBFS. The nominal level might be +4 dBu, while the max input is +24 dBu. This provides twenty decibels of headroom before things get ugly on the analog side. Hotting up your digital output can cause clipping on the analog preamps just because the DAW meter tells you everything’s good. It’s a common place where subtle distortions can creep into your workflow in a hybrid studio. Analog margin checking makes sure there is a clean signal chain from the computer to the outboard gear.
It’s more about knowing what they’re measuring. Without context meters are liars. A slow integrating meter might show a seemingly innocent spike. However, that doesn’t mean it won’t clip a fast ADC. Knowing your peak voltage as well as your RMS level provides a safer view of what’s really going on.
I didn’t need to worry about whether I left enough headroom for the compressor to work properly. No need to worry that a momentary transient will be the ruin of the final bounce. That’s headroom. It isn’t something you buy in anticipation of things going wrong, necessarily; you buy headroom because what happens if it does? The price of getting it wrong is too high.
The point where the transients breathe and you leave that headroom at the top. That’s when you can push harder, because you know your limit. This happens when you’re tracking a vocal on a live mic. Mastering an album for streaming. Mixes will sound bigger because they’re not fighting against the ceiling.