Aero Port Length Calculator
Calculate flared round port length from net box volume, tuning frequency, tube diameter, number of ports, flare correction, velocity target, and elbow centerline allowance.
Calculation breakdown
Quickly compare common tube diameters and port counts against the same box and driver estimate.
| Layout | Total area | Physical length | Velocity | Mach | Fit note |
|---|
| Piece | Centerline length | Equivalent diameters | Build note |
|---|
| Diameter change | Area change | Length change | Velocity change | What it means |
|---|
| End style | Base correction | Flare add | Best use | Warning |
|---|
| Preset | Box | Tune | Ports | Driver estimate |
|---|
You know how most folks build a box first, then worry about driver? Wrong order of operations. If you are looking for low distortion, put driver last.
The port is exhaust system on your speaker. Make a mistake there and you gets chuffing. Make it work right and you can keeps that bass clean while the neighbors complain. The calculator above performs the Helmholtz math so you don’t have to. Understanding the drivers behind those numbers are more important than the math.
How to Design Your Speaker Port Correctly
Where most people goes wrong on their projects is with net volume. Net volume is the remaining air space left after you subtract displacement of everything that goes inside. How big is sheet of MDF? Measure the outsides. That’s your gross volume. Your driver take up space. Your bracing takes up space. The port tube displaces air. If it says 45 liters tuned and you only have 38 inside, your tuning frequency move higher. The bass goes bright and thin. Subtract out everything that goes inside to calculate the net volume before putting the number in the volume field.
A small change in millimeters make a huge difference in sound. Diameter controls length. It’s a required trade-off in vented designs. Larger diameters means there’s room for more air to flow at slower speeds. The slower it flows, the less turbulence there is and the less chuffing sound occur. However, since the mass of the air column matters more then how fast it moves, then wider ports has to be made longer to get the same tuning frequency.
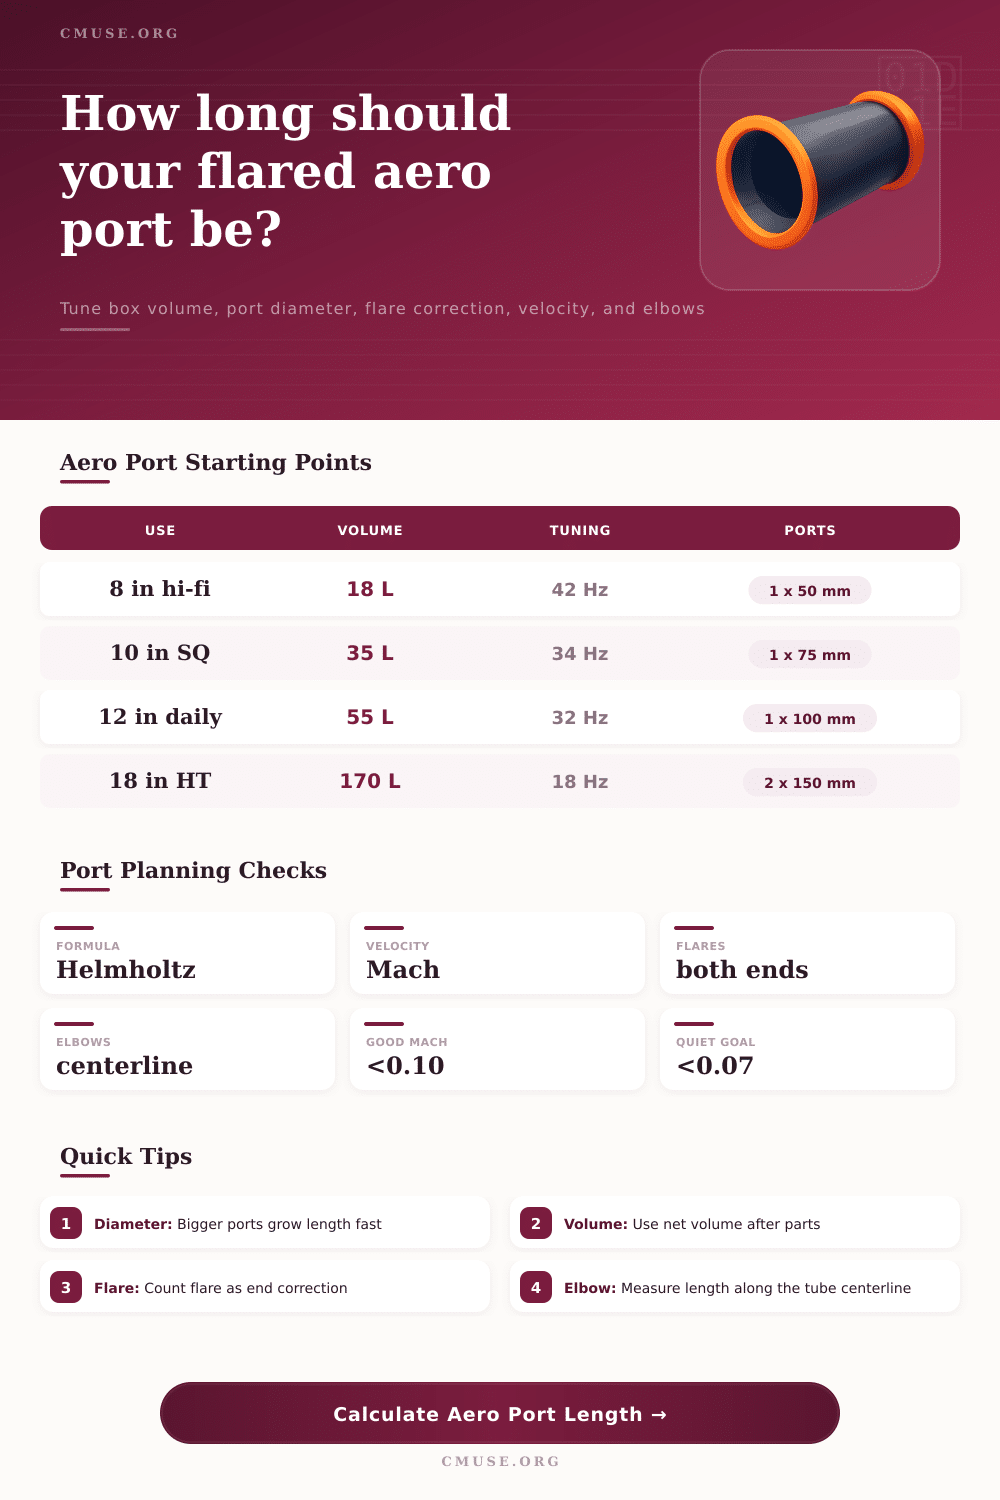
In other words, if you’re designing a compact bookshelf speaker, you can’t make huge port. That forces a narrower tube, which raises velocity. That tension is what the calculator shows you, not only the length but also the peak port velocity. To remain quiet, keep that Mach number below zero point one. Ideally, it should of been below zero point zero seven. Any higher than zero point one five and your port sounds like a jet engine.
The physics are changed but in an important way with flares. A sharp tube edge create a standing wave right at the opening. It’s as if there is more length and we can’t see it. Making the flare smooth ease that transition. The effect of the flare radius makes the tool adjust the actual sound length to compensate. Sounds academic until you hear it. Running a flared port lets you go higher speed because the air accelerate gradually versus hitting a wall. Go straight PVC, stay conservative with your velocities.
The silent killer in efficiency are elbows. Any 90 degree turn use up centerline length and adds resistance. A lot of builders will take the straight measurements and ignore that each elbow takes up some length too. This calculator does this for you by taking away the radius of the elbow from what’s left to cut out so you don’t overestimate how much tube you have. When measuring make sure you’re going right down the center line of the tube. Not on the outside edge. That little difference kill tuning if you don’t pay attention.
“Prototyping eliminates frustration.” Theorists think air flows without friction and everything is perfectly cylindrical. In reality there are glue bumps, dust covers, and bracing that nudge the tuning frequency. Make your port two inches longer than the calculation calls for. Then seal it up temporarily with something you can remove like putty or tape. Tune the frequency by measuring where the impedance peaks. Or tune it with a test tone. And trim a little at a time if necessary. It’s better to take wood off than add it on.
Included with the tool is some reference tables that list typical drivers by size with a starting point for those dimensions. You may need two hundred liters of air and a large port to keep the low end from compressing on an eighteen inch home theater sub. Conversely, a small, ten-inch studio monitor calls for precision more then brute force. The examples show that it’s all relative and scale makes the rules change. Big boxes can have long, lazy ports. Little ones requires tight, efficient designs.
Here is the bottom line. The port is the tuning fork for the entire system. It doesn’t make bass. It elongates bass. If you treat it as part of the system instead of just plumbing, the speaker will sound clearer and tighter. Begin with proper measurement of volume. Observe the velocity limits. Cut with precision. Sometimes the final few millimeters of tubing makes the difference between good bass and great bass.