Polymeter Cycle Length Calculator
Calculate when two or three meters line up again, how many bars each layer plays, and how long the full polymeter loop lasts at your tempo.
Choose a practical groove, riff, or film-score pattern to load the meter layers, shared pulse, tempo, phrase repeat count, and pickup offset. Then adjust the inputs for your own session.
Calculation Breakdown
LCM
least common multiple finds the full return
GCD
greatest common divisor simplifies ratios
2-3
layers are easiest to rehearse accurately
4/4
common reference meter for DAW sessions
7/8
classic odd riff length over straight time
16th
useful shared grid for short pedal patterns
1 bar
the return is not always one reference bar
2-4x
practice loops reveal the groove shape
| Polymeter pairing | Shared pulse | Return length | Bars before return | Useful musical role |
|---|---|---|---|---|
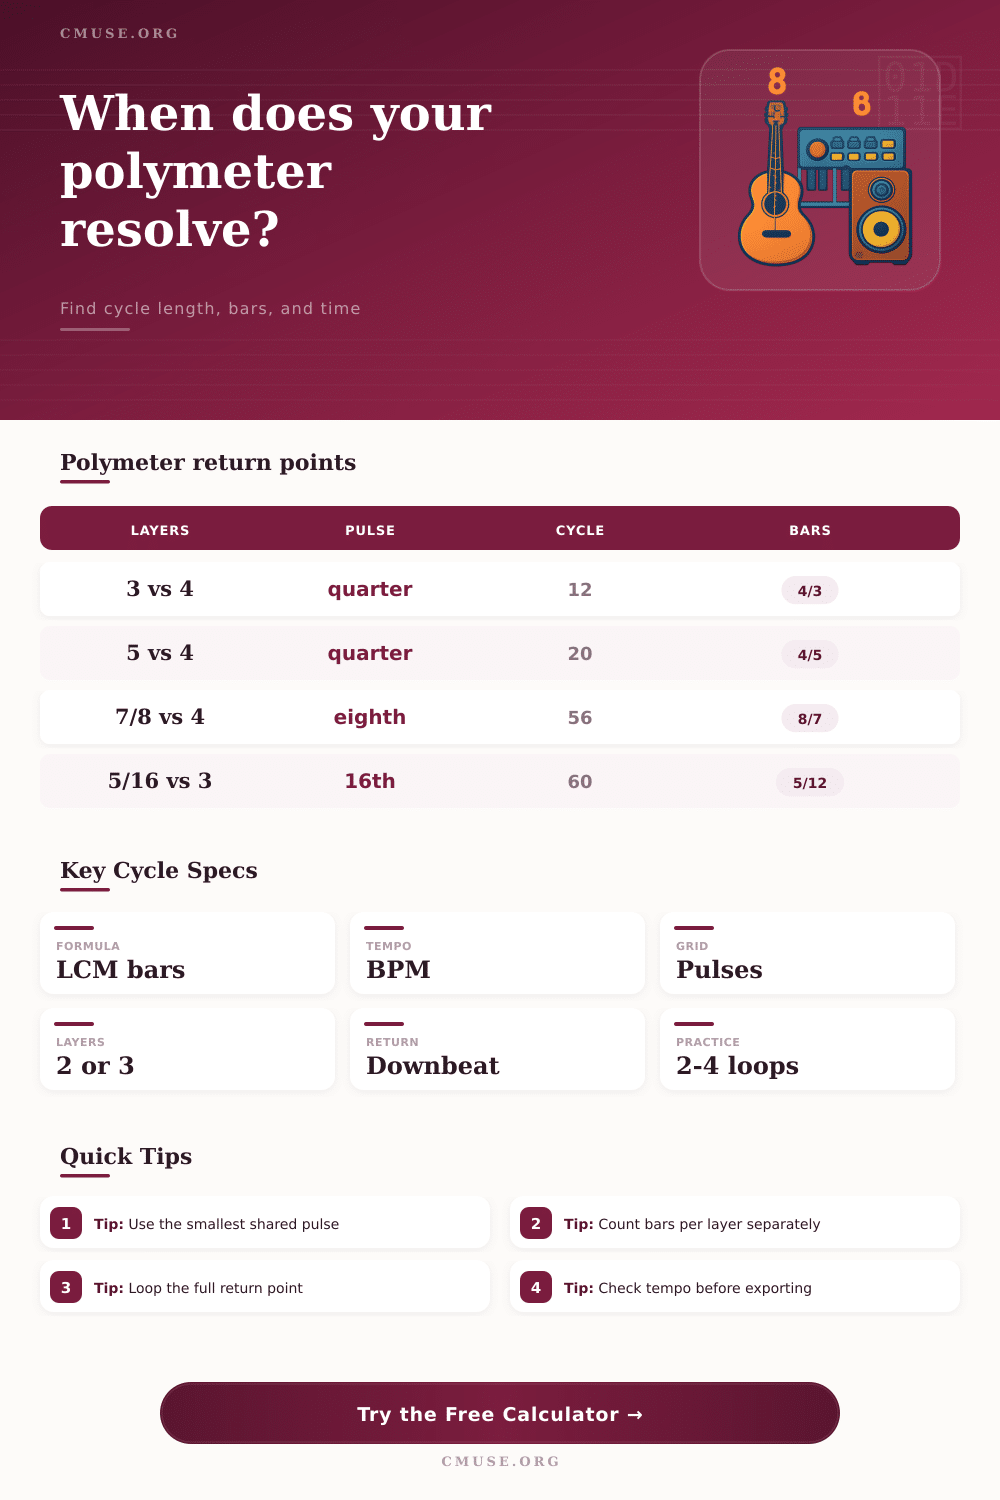
| 3/4 against 4/4 | Quarter note | 12 quarter pulses | 4 bars of 3/4, 3 bars of 4/4 | Backbeat displacement, minimalist piano figures, drum studies |
| 5/4 against 4/4 | Quarter note | 20 quarter pulses | 4 bars of 5/4, 5 bars of 4/4 | Progressive bass ostinatos and long keyboard phrases |
| 7/8 against 4/4 | Eighth note | 56 eighth pulses | 8 bars of 7/8, 7 bars of 4/4 | Odd guitar riffs over straight drums |
| 11/8 against 4/4 | Eighth note | 88 eighth pulses | 8 bars of 11/8, 11 bars of 4/4 | Long-form progressive or cinematic tension cues |
| 5/16 against 3/4 | Sixteenth note | 60 sixteenth pulses | 12 bars of 5/16, 5 bars of 3/4 | Short sequencer cells under a waltz or hemiola feel |
| Shared grid | Quarter-note equivalent | When to choose it | At 120 BPM | Counting note |
|---|---|---|---|---|
| Quarter-note pulse | 1.00 quarter note | Both layers use quarter-note bars such as 3/4, 4/4, 5/4 | 0.500 seconds per pulse | Count the main beat |
| Eighth-note pulse | 0.50 quarter note | One layer uses 5/8, 7/8, 9/8, 11/8, or 13/8 | 0.250 seconds per pulse | Count eighths or grouped accents |
| Sixteenth-note pulse | 0.25 quarter note | Short cells, pedal tones, or 5/16 and 7/16 patterns | 0.125 seconds per pulse | Count subdivisions carefully |
| Finer internal grid | Use a smaller note value | Needed when denominators do not fit the selected pulse cleanly | Depends on subdivision | Use the DAW grid if unsure |
| Cycle length feel | Suggested repeats | Rehearsal focus | Click approach | What to listen for |
|---|---|---|---|---|
| Under 12 pulses | 4 to 8 cycles | Internalizing the accent pattern quickly | Click every pulse, then every bar | Whether the return feels predictable |
| 12 to 32 pulses | 3 to 6 cycles | Keeping the main groove stable while the riff rotates | Click the reference meter only | Strong downbeat after the loop returns |
| 33 to 88 pulses | 2 to 4 cycles | Long-form phrasing and arrangement cues | Use count-in plus bar markers | Entrances that drift before the final return |
| Over 88 pulses | 1 to 3 cycles | Score structure, cue timing, or DAW clip length | Mark every phrase return in the timeline | Whether the cycle is musically practical |
| Workflow | Use this result | Setup move | Common mistake | Check before export |
|---|---|---|---|---|
| Loop recording | Full return cycle | Set the loop brace to the calculated pulse length | Looping only one reference-meter bar | Both layers start together after the loop |
| Click track | Bars per layer | Keep the click in the reference meter and mark the other layer | Changing the click meter every bar | The performer hears a stable anchor |
| MIDI sequencing | Shared pulse grid | Program note starts on the smallest shared division | Quantizing odd cells to the wrong grid | Last note releases before the return point |
| Score layout | Phrase repeat time | Add rehearsal marks at each full return or larger phrase | Hiding the long cycle from the players | Page turns and cues land outside hard entrances |
If you listen to a song, you might notice that guitar or bass doesn’t quite match up with drums. If it eventualy locks into place, it can create tension in the piece. Polymeter occurs if there are two contrasting time signatures cycling against each other. This creates longer phrases where sections only align at certain points.
It’s like knowing the exact moment two different rhythms will align again so you don’t lose whole groove. This happens with many riffs first heard in 7/8 that most musicians instinctively wants to play over a regular 4/4 drum pattern. It is tempting to loop phrase instantly. However, this can cut the phrase out too soon and the downbeats begins to move away from one another. The track feel like it’s falling behind.
How to Use Polymeter in Your Music
Before pressing record, you have to calculate how long the loop will take to complete. This way you can find where they will both meet again. This make sense structurally if you want to keep your arrangement tight. The fundamental idea is to determine the least common multiple between pulse counts for each of your layer. One may be three bars at 3/4 while another is four bars at 4/4. That mean they will come back together only after twelve beats.
The tool crunches those numbers for you so you can listen out for the feel instead of the fractions. With that knowledge of a twelve-beat window you can insert harmonic changes or accent to match resolution of tension. The biggest trip-up is often choosing the correct shared pulse grid. If your song mix 4/4 with a 7/8 time signature, you cannot use a quarter-note basis. This is because eighth note in the 7/8 bar divides the bar into two parts. Drop back to the lowest subdivision where both meters count cleanly. In this case, it’s typically to an eight or sixteenth note grid.
After all bars have been defined by the same number of these little pulses, the return point shows itself naturaly. At this point tempo becomes more important then it may initially seem. For example, a ten-second piece that contains a complex polymeter with 140 beats per minute could be easily assimilated in rehearsal but the same mathematical cycle played at 60 beats per minute will extend for forty seconds, challenging not only the timing and memory of all player but also length of the phrase itself.
The calculator can then translate pulse count into actual clock time. This shows you whether the phrase remains musically practical or if it is now too long to stay cohesive without visual guidance. Knowing the duration of a single loop isn’t just about how long it lasts; it helps you map out larger transitions and communicate timelines. In the world of film scores or progressive rock, music arrangements will often extend this pattern by repeating it four or five times. Before moving on to another section for example. If you know exactly how long a single loop lasts then you can plan out where these bigger changes occur.
This gives you something tangible based off an otherwise mysterious form of tension and a way of communicating it to others or programming it directly within your digital audio workstation. Hold one layer in place, spin the other around. The listener is anchored by a solid foundation. A repeating bass pattern and a constant drum click serve as an anchor point. Without this anchor, the odd-meter pattern drift and creates chaos. Mark your timeline on the full cycle length, don’t arbitrarily clip it. Let it breathe until the downbeats crash in unison and begin again.
Controlling dissonance in time is what polymeter’s all about. Imagine two gears with a different number of teeth on each one trying to mesh together. You get a grinding sound as they struggle to mesh but then they suddenly click into perfect synchronization. When you hear that click, and you’re sure where it is, you’ve stopped fighting the rhythm and started using it to construct your own phrase which feels both inevitable and surprising. The math provides the map but the groove is what makes you want to follow it.