Flanger Delay Calculator
Turn flanger delay time into first notch frequency, comb filter spacing, delay in samples and the number of notches – plus map the full LFO sweep range
Full Calculation Breakdown
| Notch / Peak | Order k | Frequency | Type |
|---|---|---|---|
| — | — | — | — |
| Delay (ms) | First Notch | Comb Spacing | Notches to 20kHz |
|---|---|---|---|
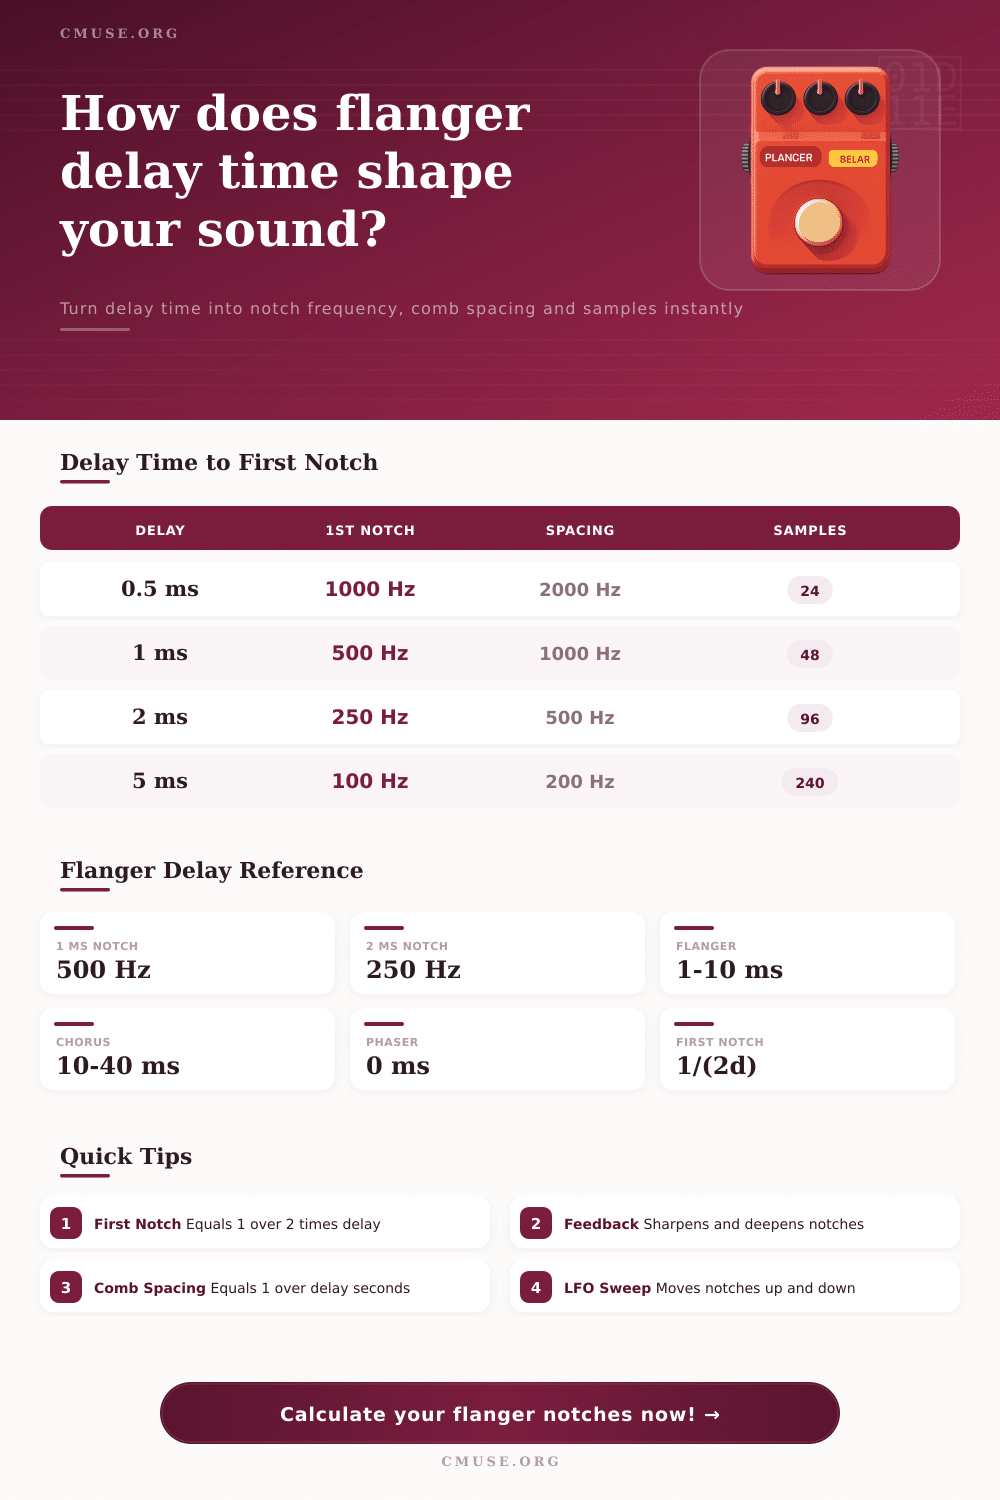
| 0.5 ms | 1000 Hz | 2000 Hz | ~10 |
| 1 ms | 500 Hz | 1000 Hz | ~20 |
| 2 ms | 250 Hz | 500 Hz | ~40 |
| 3 ms | 167 Hz | 333 Hz | ~60 |
| 5 ms | 100 Hz | 200 Hz | ~100 |
| 8 ms | 62.5 Hz | 125 Hz | ~160 |
| 10 ms | 50 Hz | 100 Hz | ~200 |
| Delay (ms) | Samples @ 48k | Samples @ 44.1k | Samples @ 96k |
|---|---|---|---|
| 0.5 ms | 24 | 22 | 48 |
| 1 ms | 48 | 44 | 96 |
| 2 ms | 96 | 88 | 192 |
| 3 ms | 144 | 132 | 288 |
| 5 ms | 240 | 221 | 480 |
| 8 ms | 384 | 353 | 768 |
| 10 ms | 480 | 441 | 960 |
| Effect | Delay Range | Mechanism | Character |
|---|---|---|---|
| Flanger | 1–10 ms | Comb filter + LFO | Jet sweep, metallic |
| Chorus | 10–40 ms | Detuned delay + LFO | Thick, shimmery |
| Phaser | 0 ms (allpass) | Allpass notches | Swirly, vowel-like |
| Doubler | 20–50 ms | Short static delay | Wider, fuller |
Flanging gives you a sweep across the audible frequencies, a kind of metallic shimmer, but what’s realy happening is a rapid cancellation of frequencies. Two signals is mixed and the effect causes holes to be cut into spectrum, which then slide up and down. These two signals consist of original signal and a delayed version of it… Usually by only a very small amount, anywhere from one millisecond to about ten milliseconds. As these two signals come together they begins interfering with one another: some frequencies will cancel out, others will reinforce the sound producing a sort of comb filter pattern. In frequency analyzer, this looks like teeth of a saw. What happens is a sort of whooshing effect on drums, synths or guitars.
But knowing exactly where those cancellations occur within the frequency range make all the difference for the desired effect. Leaving out all the technical jargon, it’s pretty easy to understand the math here. The length of your delay line determines where first notch (the position of lowest cancellation) occurs. For example, a one millisecond delay means the first notch occur at five hundred hertz. Double the delay (two milliseconds) and now the notch aligns at two hundred and fifty hertz. Long story short: Longer delays pull the whole comb filter pattern down the spectrum; so there is an inverse relationship.
How Flanging Works
When used in mixing, a low-mid notch bring a hollow quality to an instrument such as a bass guitar or snare drum. A high-mid notch imparts a bright nasal characteristic that slices right through a dense mix. Rather than do the math in our head, the included calculator translates your desired delay time directly into these target frequencies.
Next think about how far apart those notches are from each other. The spacing between those notches is determined by the inverse (1/delaytimeinseconds) of the delay time. One millisecond equals one thousand hertz apart. Two milliseconds equal five hundred hertz apart. The closer together those notches are the more notches will be packed into any single octave range. And that alters the texture of this effect because when spaced widely enough, the notches can sound somewhat mechanical and sparse if not used carefully. Denser spacing feel smoother and adds thickness to the sound instead of acting like a clearly defined modulator. Most engineers favor the tighter spacing of short delays since it tend to blend better with original material. Instead of sounding like an obvious addition, it sounds like an enhancement of the instrument.
Static flanging does occur, but it tends to be unwanted and uncommon because it produces static resonance that clashes with your melodic notes. The effect works by modulating the delay time using a low-frequency oscillator, or LFO. It sweeps the comb filter up and down the frequency range which brings some motion to the effect. For example, slow rate at zero point five hertz give a full swell that would of worked well on ambient pads or film score sounds. For more rhythmic effects like on funk and eighties new wave records, use a faster rate at four hertz.
The depth of the sweep determines how far frequencies move up and down the range. If the sweep is too shallow, it will sound static. If it is too high, it can produce harsh phasing artifacts that aren’t very pleasant to listen to.
The resulting character of the sound is heavily dependent on amount of feedback used. Increasing this will emphasize the reinforced frequencies while increasing the difference between them and the canceled ones. When kept low, the effect is more of a subtle thickener similar to a chorus. Push it up to seventy percent or more and it becomes ringing and intensely metallic. Be cautious if using high amounts as it can lead to digital instability and even self-oscillation (in software plugins). The table below shows how these figures scale at different sample rates, which is useful when working in a high-resolution environment like a recording studio.
It’s important to select an appropriate delay time that works with your instrument. Lower frequency instruments like guitars tend to fare better with shorter delays (1; 3 mSec), whereas drums performs well with super-short delays of less than one millisecond, adding width without blurring the transient attack. Vocals can often be in the sweet spot between two and five milliseconds for that classic pop track. You’re looking to align the filter’s movement with the natural resonance of the original material. These relationships help turn the flanger from a mysterious button into a precise tool. There is no more guesswork on what’s going to happen in the mix. Instead, you’re deliberately designing it. A modulated delay becomes the dynamic element driven by the modulation speed, working alongside the frequency notches and the delay time. You can learn how to cut precisely in the frequency spectrum and move those cuts to add motion. Knowing where your first notch occurs and how far apart the next set of notches occur allows for the creation of sound that improves musicality. That jet plane thing is simply math traveling at a pleasing speed and you now have the roadmap to manipulate it.