Reverb Pre Delay Calculator
Blend tempo lock, first-reflection timing, and source clarity so the reverb starts after the dry hit but before the mix turns blurry.
🎧 Session Presets
📈 Timing Inputs
📋 Quick Spec Grid
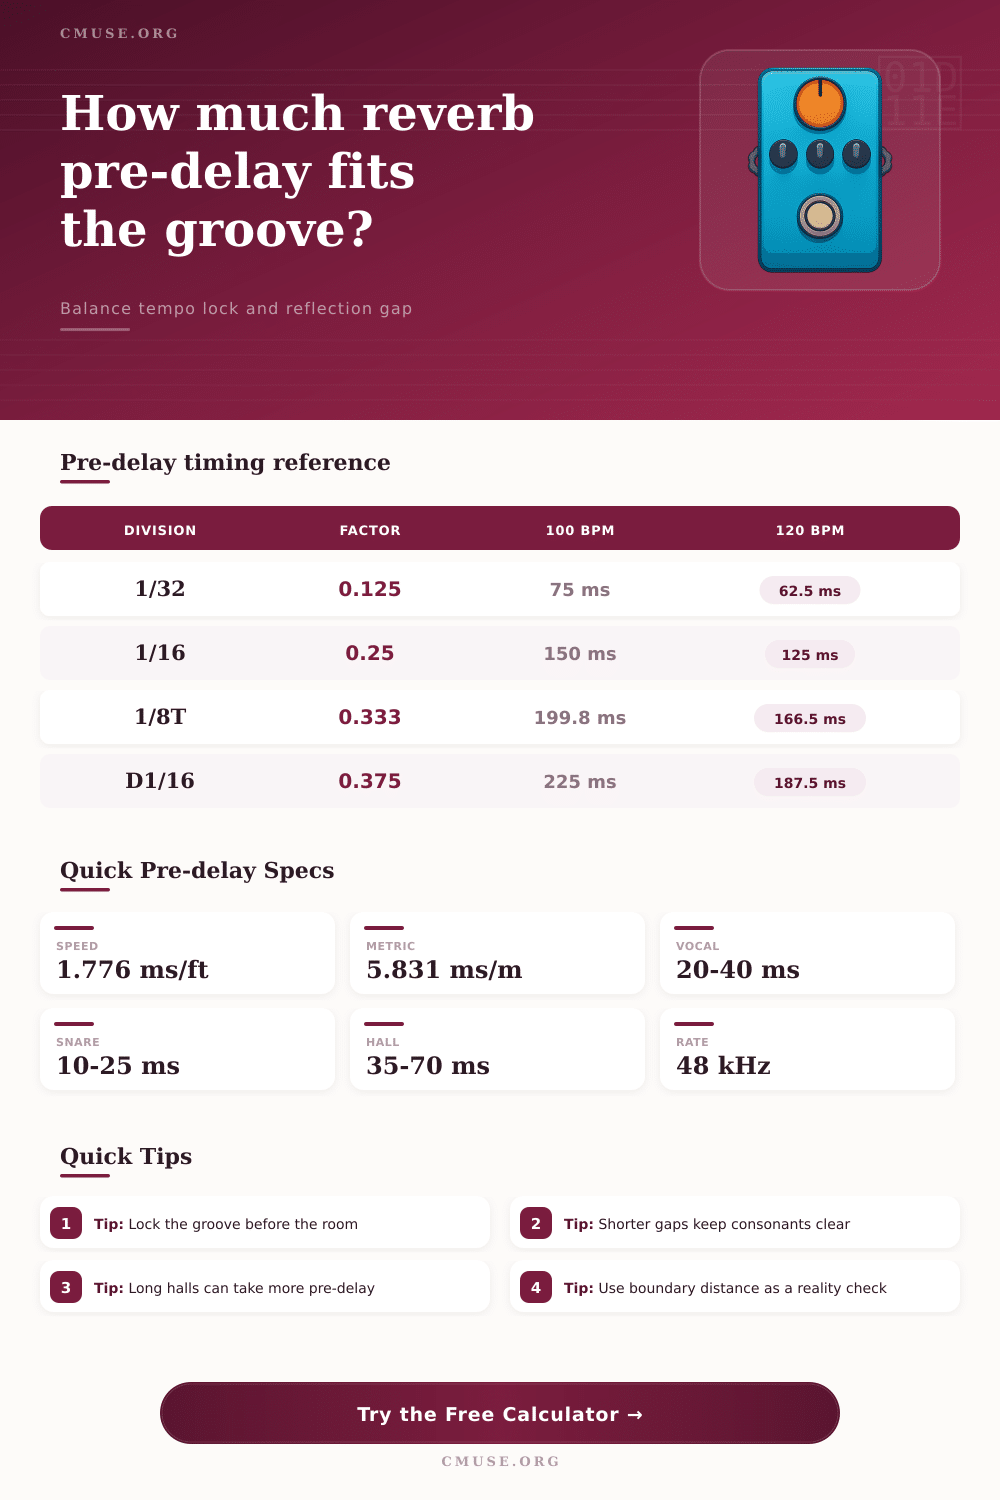
📑 Musical Timing Reference
| Division | Factor | 100 BPM | 120 BPM |
|---|---|---|---|
| 1/64 note | 0.0625 | 37.5 ms | 31.3 ms |
| 1/32 note | 0.125 | 75 ms | 62.5 ms |
| 1/16 note | 0.25 | 150 ms | 125 ms |
| 1/8 triplet | 0.333 | 199.8 ms | 166.5 ms |
🎤 Source Target Windows
| Source | Sweet Spot | Best Lock | Notes |
|---|---|---|---|
| Lead vocal | 20-40 ms | 1/32 to 1/16 | Keep consonants clear |
| Snare drum | 10-25 ms | 1/64 to 1/32 | Preserve punch |
| Acoustic guitar | 14-32 ms | 1/32 to 1/16 | Protect strum edge |
| Piano / keys | 18-45 ms | 1/16 to 1/8 | Wide without blur |
🎨 Reverb Style Guide
| Style | Range | Density | Best On |
|---|---|---|---|
| Room | 8-20 ms | Lean | Drums, amps |
| Plate | 18-35 ms | Even | Vocals, snare |
| Chamber | 22-45 ms | Thick | Guitars, piano |
| Hall | 35-70 ms | Large | Choir, pads |
📝 Preset Comparison
| Preset | BPM | Source | Predelay |
|---|---|---|---|
| Pop Vocal Plate 92 | 92 | Lead vocal | 28 ms |
| Snare Chamber Snap 120 | 120 | Snare drum | 14 ms |
| Ballad Piano Hall 76 | 76 | Piano / keys | 41 ms |
| Choir Cathedral Lift 72 | 72 | Choir stack | 57 ms |
💬 Mix Tips
Pre-delay is a setting within a digital reverb effect that allow for a time gap to be establish between the dry signal and the wet signal. If a person selects a reverb without enough pre-delay, the dry signal and the wet signal will collide with one another. As a result, the audio will sound smear or blurry and the clarity of the original signal will be reduced.
By utilizing pre-delay, however, a person can separate the dry signal from the wet signal so that the dry signal maintains it’s original clarity. Pre-delay within a digital reverb effect work in a manner that simulate the behavior of sound within a physical room. With physical rooms, the sound from some source travel to a wall and reflect off of that wall to return to the listener.
What Pre-delay Does and How to Set It
The time difference between the arrival of the original sound and the arrival of that reflected sound is the time gap between those two sounds, which is known as the pre-delay. Thus, by utilizing pre-delay within a digital reverb, if the pre-delay is set too short, the reverb will overwhelm the source of the sound. However, by correctly adjusting the pre-delay settings, the reverb will enhance the sound from the source without overwhelming that source.
In some instance, it is also possible to utilize the pre-delay settings to sync the vocals with the tempo of the song. At 120 beats per minute, for example, there are sixteenth notes every 125 milliseconds; thus, by setting the pre-delay to 125 milliseconds, the vocal track will sync with the rest of the song. At a slower tempo, however, utilizing the pre-delay setting to a full quarter note may result in the vocals sounding somewhat detached from the song.
Additionally, each type of instrument may require a different amount of pre-delay. For instance, vocals may require between 20 and 40 milliseconds of pre-delay, while snare drum may require between 10 and 25 milliseconds of pre-delay. Many audio engineers will begin with a pre-delay setting of 20 milliseconds.
After establishing this initial setting, the engineer may adjust the setting according to the audio that is create by adjusting the amount of pre-delay. Additionally, each type of reverb may require a different amount of pre-delay. For instance, plate reverbs and chamber reverbs may have even (the same) pre-delay settings requirements.
In contrast, hall reverbs may have longer pre-delay settings to avoid creating a blurry sound. Finally, the amount of density within the reverb may also impact the amount of pre-delay that is required for that sound effect. The pre-delay setting is not a fixed value that will work for all songs and instruments within a song.
For instance, if a person applies a 15-millisecond pre-delay to a piano recording for a ballad with a slow tempo, the pianos attack may drown in the echo of the programmed pre-delay. In the opposite scenario, however, applying a 60-millisecond pre-delay to a fast snare drum will likewise reduce the sharpness of the snare. Thus, the pre-delay is dependent upon the tempo at which the song will be performed and upon the purpose of the song.
For instance, pre-delay settings will be different for a spoken word track in a recording booth than for a choir that are singing in a cathedral. Finally, many digital reverb plugins allow engineers to utilize presets that will assist the engineer in finding the proper pre-delay settings for each type of project. For instance, a vocal track at 92 beats per minute may require a pre-delay of 28 milliseconds within a plate reverb.
Additionally, a snare in a chamber reverb at 120 beats per minute may require a pre-delay of 14 milliseconds. Finally, a piano within a hall reverb at 76 beats per minute may require a pre-delay of 41 milliseconds. These settings are not “magic,” but they have been tested and proven to be effective starting points for engineers to find the perfect setting for each instrument in each song.
In order to properly adjust the pre-delay settings within a digital reverb effect, a person can solo the return channel and listen to the tail of the reverb. The dry signals attack should fade into the reverb tail. In addition to soloing the return channel, however, it is also important to listen to the full mix to ensure that the dry signal still cut through the mix.
Additionally, utilizing parallel processing can allow engineers to better blend the return channel and the dry signal. Finally, A/B testing can be used to compare the sound with a zero pre-delay setting to the setting with the calculated pre-delay value. If the dry signal seems to recede too much with the pre-delay setting, the person should of shortened the pre-delay.
In contrast, if the reverb setting within the digital reverb plugin sounds too empty, the pre-delay should be extended.